Welcome to another Vista based tutorial! Today I am going to teach you just how easy it is to share a locally attached printer with other computers on your network. By locally attached, I mean a printer that is connected locally to a PC via a USB or parallel adapter, and is not connected to a HUB or Router. We’re going to create the share with Vista, but you will be able to link to the share from any Windows machine.
This tutorial is split into 2 sections… first we will look at how to create the share, then we will look at how to add the shared printer to your other computers.
Shall we dance?
Creating the Shared Printer
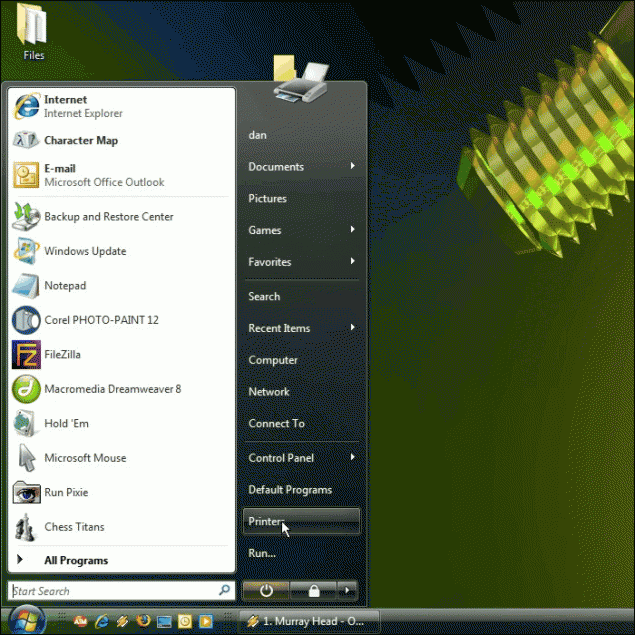
Step 1 – Click on Start > Printers to load the Printers configuration menu:
WARNING: You may have to customize your Windows Start Menu to enable the Printers button so it shows up in the Start Menu like in the Screenshot. If you don’t want to do that, click on Start > Control Panel to open your control panel and double-click the Printers Icon to access the Printers Configuration Menu.
This is what the Printers Configuration Menu looks like once it’s opened. It will list any Online or Offline printers you currently have installed:
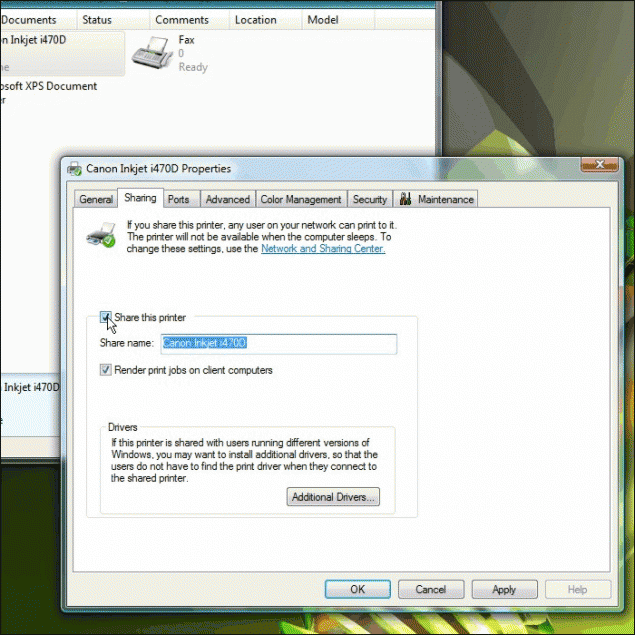
Pro Tip: You can assign a share name if you don’t want to use the default. You can use any name you want! You can also attach driver packs, which allows you to install the share from other Windows versions without having to have the drivers on hand from those PCs. If you don’t add driver packs here, you may have to have the drivers on-hand from any non-Vista PCs you attach to the shared printer. Not a big deal, just giving you a heads up!
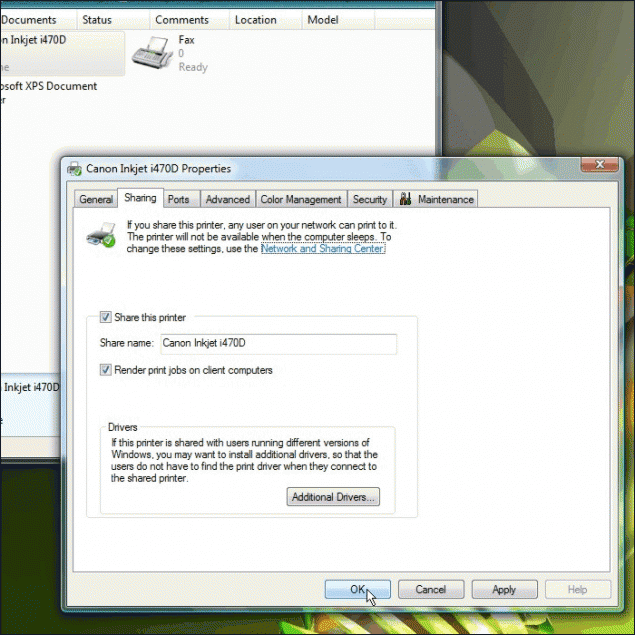
Step 4 – Once you click OK, it will process the Share request for a second or two and then go back to the main Printer menu. You will notice that your printer now has the Shared icon attached to it:
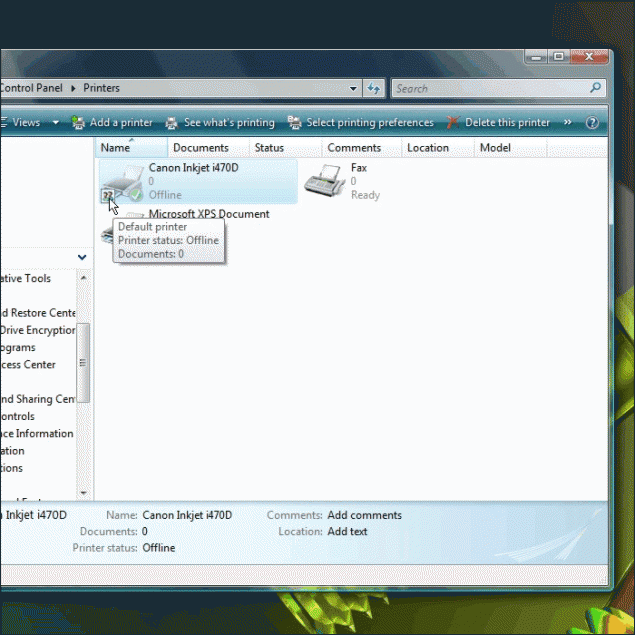
You’re done! Your printer is now shared and ready for use by other computers on your network. Let’s look at page two to learn how to add this shared network printer on your other computers!
Adding the Share to Other Computers
Adding the shared Printer is extremely easy, but may vary slightly depending on the version of Windows you are using to add the printer. The steps will be very similar to the process we’ll use here in Vista, but you may have to install drivers for your OS.
WARNING: If you are going to be adding this shared printer from a version of Windows that is different than the version used to create the share, be sure to download and have the appropriate drivers ready in case your OS requires them.
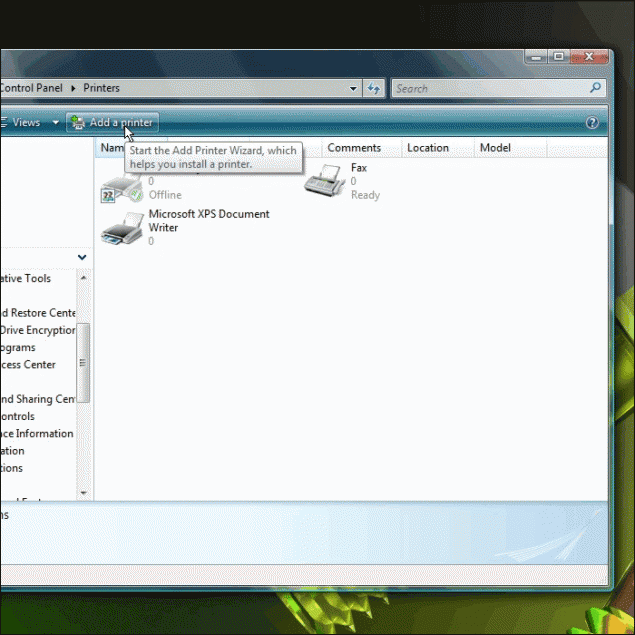
Step 1 – Once again, open up the Printers Configuration Menu and click on Add a Printer:
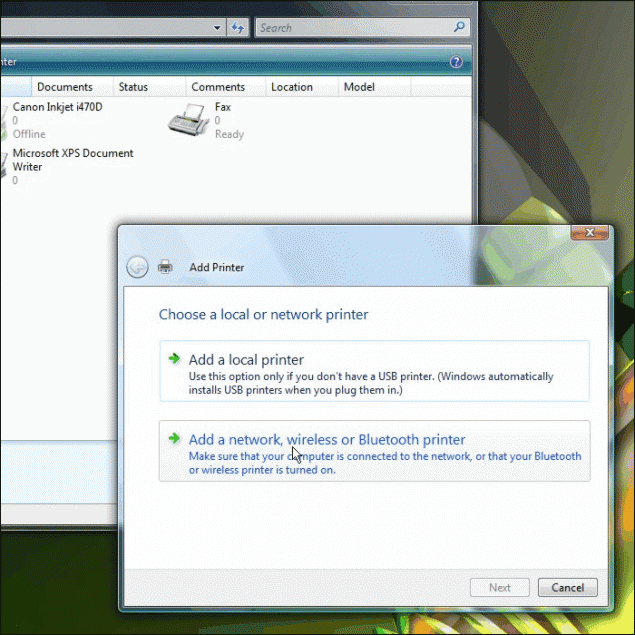
Step 2 – You will then be prompted to select either a local or network printer installation. Be sure to select network printer!
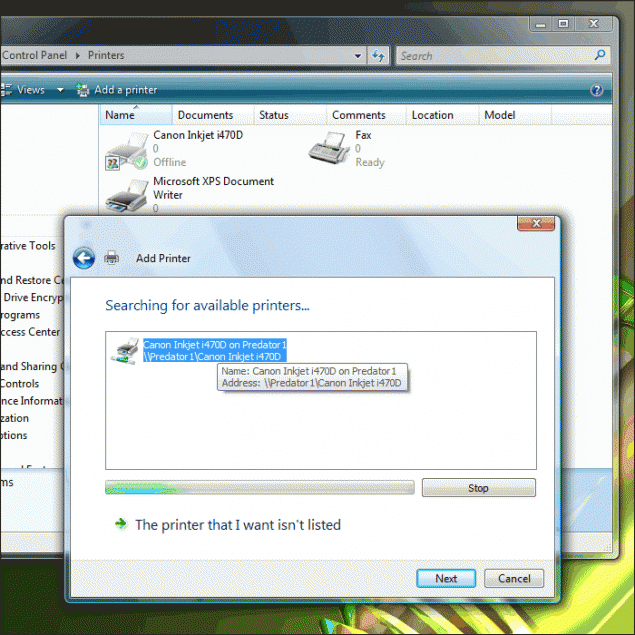
Step 3 – Now this is where things may be different depending on your version of Windows. In Vista, you will be presented with a listing of available shared printers on your entire network automatically, but others may have your browse a list of PCs with shares attached to them. If you are using the browse method, just find the network name of the PC that is sharing the printer and double click it and it should show you the printer itself. Click on that and you’re in business.
Here in Vista it’s pretty straight forward… all you have to do is click the shared printer you want and click Next:
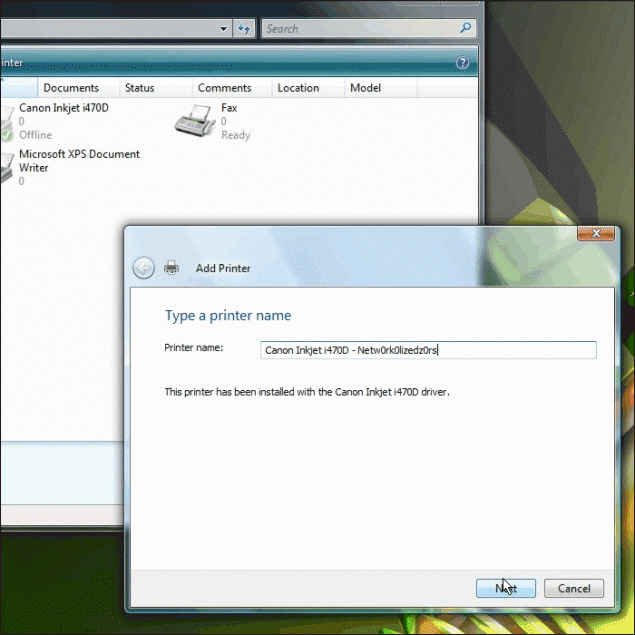
Step 3 – Name your printer to whatever you want or stick with the default and click next:
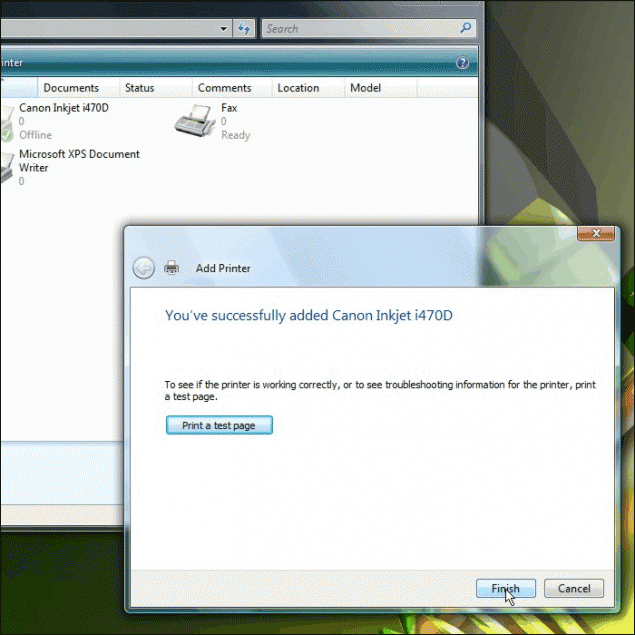
Step 4 – Click Finish and you’re done! You can also fire off a test page just to make sure your share is set up properly:
WARNING: Take note that the share only works when the PC that is hosting the share is turned on! If the machine to which the printer is connected is not powered up, your documents will not print from other PCs.
Thanks for reading and I hope you found this tutorial helpful!
Dan


