How to get your HP Scanjet 5300c Scanner Working in Windows Vista!
Introduction
If you’re reading this tutorial and are indeed the owner of a Scanjet 5300c or other 5300 model, and you recently upgraded to Windows Vista, then you are probably one pissed off individual.? Like me, you went to the HP website to download the Vista drivers and you were greeted by this PATHETIC message:
We are sorry to inform you that there will be no Windows Vista support available for your HP product. Therefore your product will not work with Windows Vista.
The majority of HP products not supported in Windows Vista are beyond seven years old. If you are using the Windows Vista operating system on your computer, please consider upgrading to a newer HP product that is supported on Windows Vista.
HP has numerous products on the market that support Windows Vista: http://www.hp.com/united-states/tradein/home_flash.html
I actually had to re-read this, especially since I bought this scanner 4 years ago, not 7. So at this point, I swore an oath that I will NEVER purchase another HP product based on this blatant laziness on the part of HP and trying to shove their clients to buying new products for no reason. I was fuming for days after this, I seriously couldn’t believe they would essentially crap on their clients like this. I can understand phasing out very old products, but my 5300c was purchased at a retail store in 2003 or 2004.
So, I started fooling around with the settings and guess what? I found out how a simply adjustment that takes 5 seconds will get your 5300c scanner to work fine with your HP Precision Scan Software! Ready to take back control of your perfectly good HP scanner? Here’s how you do it:
Installing the Drivers and Software
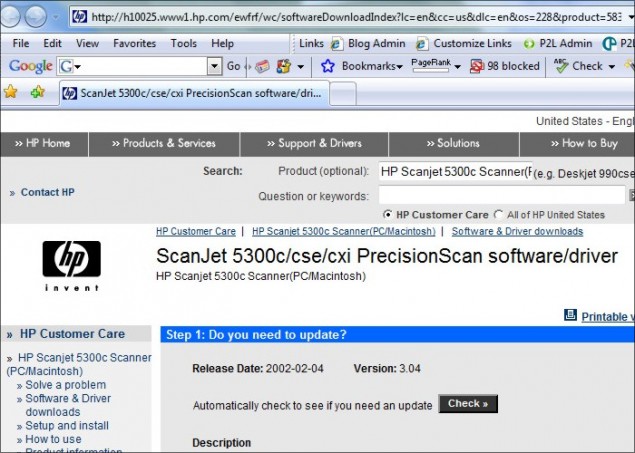
Step 1 – Visit the HP website driver page for the 5300c or whichever 5300 series Scanjet you have. Here’s the driver page for HP Scanjet 5300c.
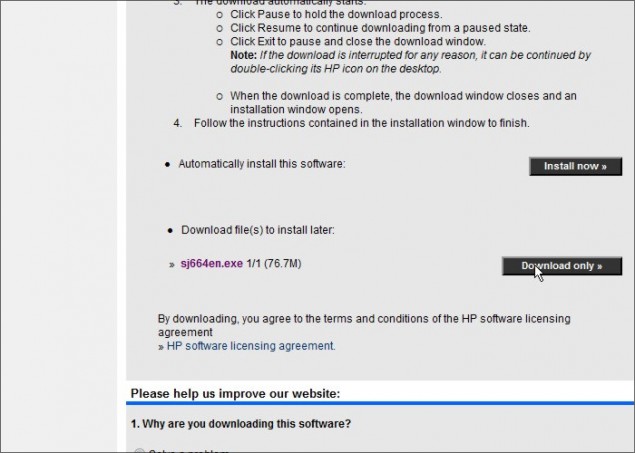
Step 2 – Ignore the “Check for automatic updates” section at the top of the page and scroll down to the bottom and click on the “Download Only” button to save the sj664en.exe file to your hard-drive.
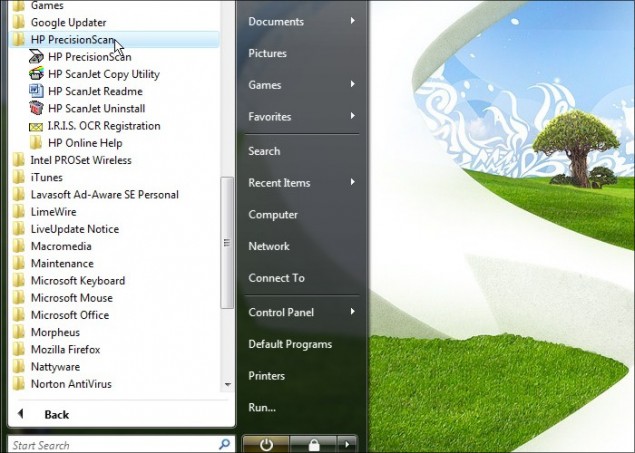
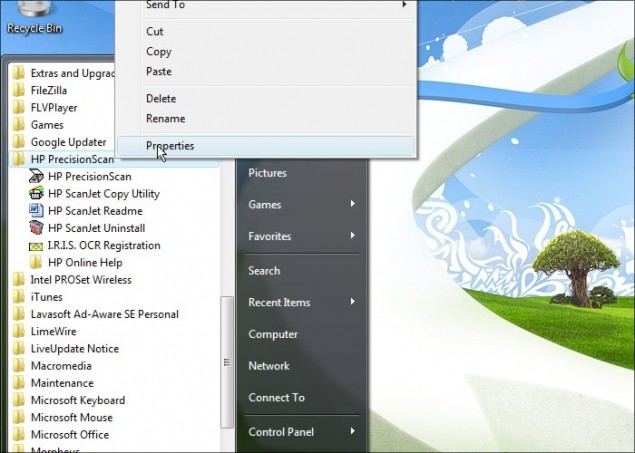
Step 3 – Run the application to install the Precision Scan software and drivers and then connect your Scanjet to your PC. You should now see the Precision Scan software in your program list like this:
You’ve successfully install the software and drivers! Time to tweak the settings to get your scanner working again.
Software Settings
Step 1 – You’re not going to believe just how simple and easy this tweak is to get your scanner working again, and quite frankly HO should be ashamed of themselves.? With your programs open in the Start Menu in the previous step, right click on the HP Precision Scan folder and click on Properties.
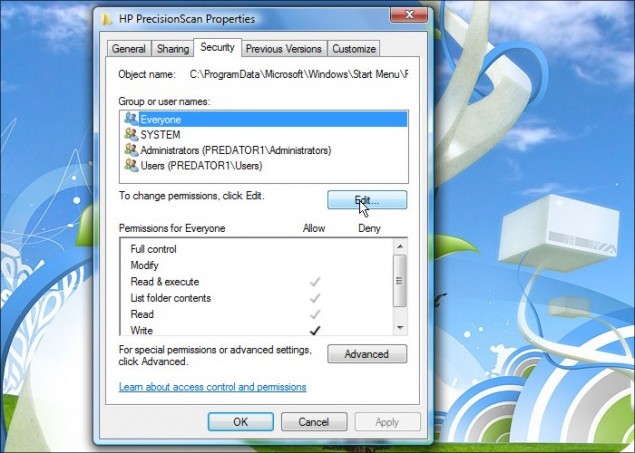
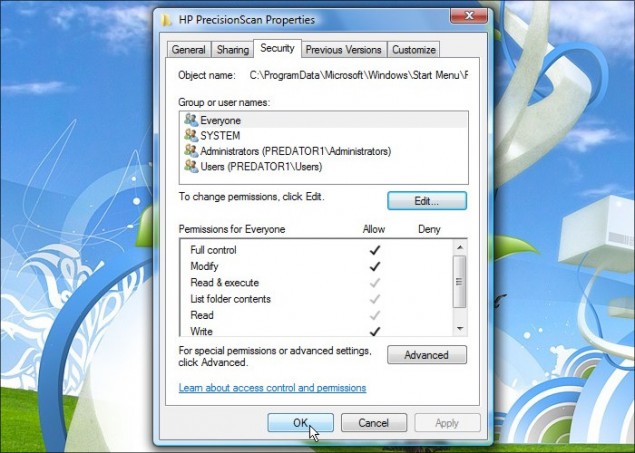
Step 2 – Once the Properties window opens, click on the Security tab and you’ll notice that All Users doesn’t have “Full Control” access to the application. Click on the Edit button to fix the permissions.
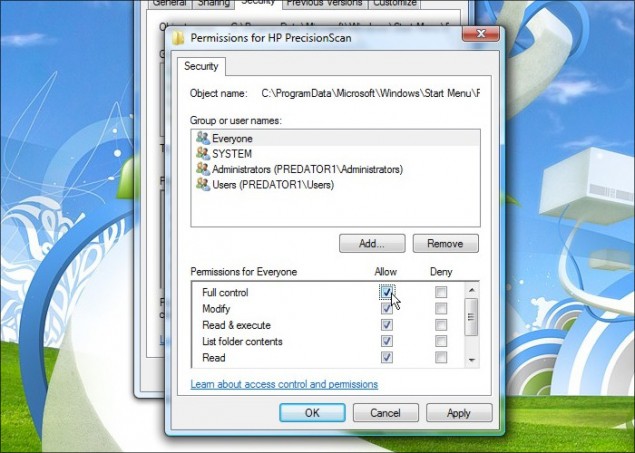
Step 3 – In the Edit window, click on each user and click on the Allow check-box for Full Control.? It’s important to ensure that every user type has full control.
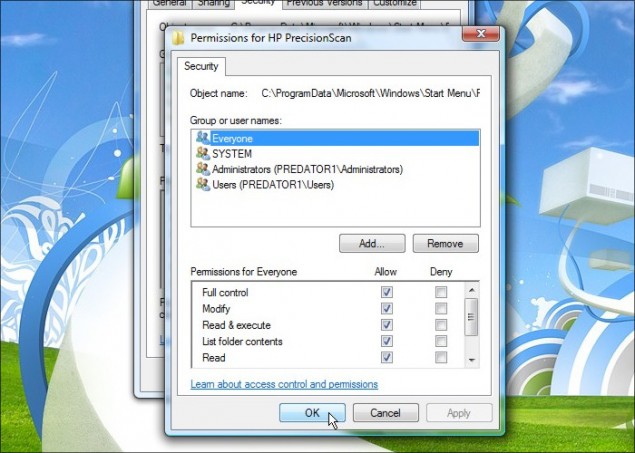
After you’ve assigned full control access permissions to all users, click Apply and OK to return to the Properties window:
Then click OK in the main Properties window:
Step 4 – Now your new permissions SHOULD apply to all the applications in that HP Precision Scan folder, but you should repeat all the steps above to ensure that all the listed applications are all set to Full Control for all users.
After that, you’re in business!
It’s Scan Time!
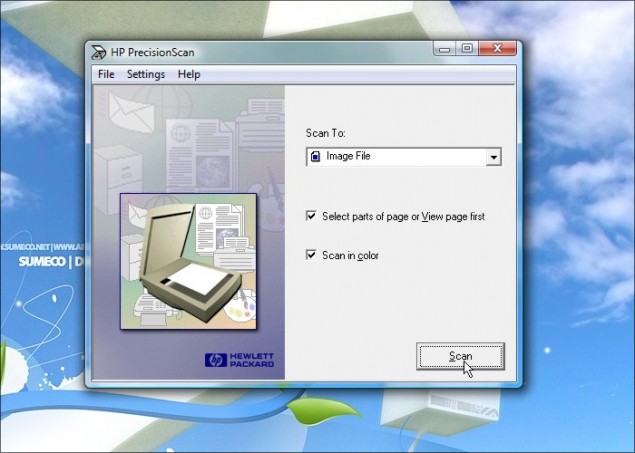
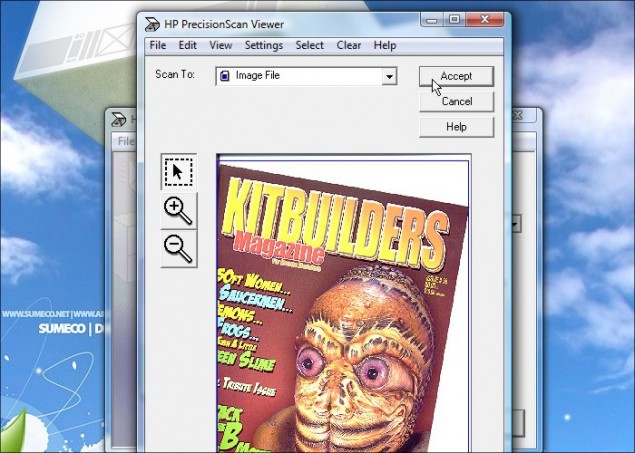
Now click on the HP Precision Scan utility and the scanning utility will come up.? Click to scan and you will no longer get the “No scanner connected” error that you were getting before if you were trying to use the XP drivers without tweaking the security settings as described in this tutorial.
SUCCESS!
I think Canon just won themselves a new customer next time I go scanner shopping.
Thanks!
Dan
