Publishing System Improvements – Multi Upload and Public vs Private!

Publishing System Improvements – Multi Upload and Public vs Private!

Hi guys,

Just wanted to give everyone a heads up that NG has added two new features to the P2L Publishing System:

Multiple Image Upload

Have a ton of images to upload and you're tearing your hair out doing on by one? Have no fear, multiple upload is here! Simply go to your Image Collections Management area and click on "upload multiple items" located just under the form, or if you already have images in that collection, under the images in the toolbar.

Simply click on the browse button to add a file to the upload list (you can have up to 25 items) and click upload to submit them. The beauty of this is that the image's title and description will be automatically filled in based on the filename. You can even use the underscore symbol _ to generate spaces in the title and description.

So if you submit an image called "hell_world.jpg", the title and description will be automatically assigned as "hello world".

Private and Public Unpublished Tutorials

Whenever you create a new tutorial, it is now set to private and no one can view that tutorial until you publish it. You can click on "Public" under the Display Settings area when editing your tutorial and click submit to open up the tutorial so you can link it to others for previewing.

That's about it, enjoy!

Dan

VideoSnag.com – New Site to Download Streaming Video from Youtube, Myspace, DailyMotion, MetaCafe, Blip.tv, Google Video and IFilm

VideoSnag.com – New Site to Download Streaming Video from Youtube, Myspace, DailyMotion, MetaCafe, Blip.tv, Google Video and IFilm

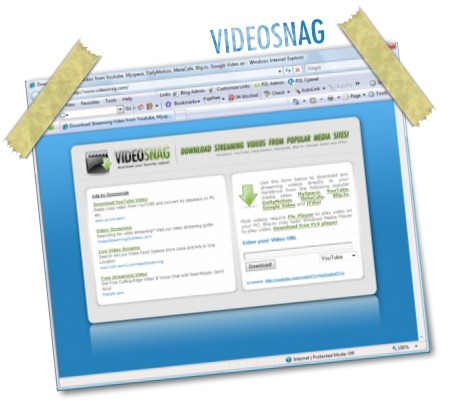
Check out a brand new site I launched tonight used to download Streaming Video from Youtube, Myspace, DailyMotion, MetaCafe, Blip.tv, Google Video and IFilm!

VideoSnag.com

It’s a simple script that generates a .flv video file that you can download directly to your PC for offline viewing, and it’s completely free. Have a look at www.videosnag.com.

Enjoy!
Dan

New site for Downloading Streaming Videos from YouTube, MySpace etc…

New site for Downloading Streaming Videos from YouTube, MySpace etc…

Hey guys,

I just wanted to show you a new site I set up that lets you download streaming videos from MySpace, YouTube, DailyMotion, MetaCafe, Blip.tv, Google Video and IFilm! Give it a shot at http://www.videosnag.com and let me know how it looks and works for you. ATM there is a small issue with the examples that I am working on, but it should all work nicely.

Thanks,
Dan

How to Share a Local Printer on your Network with Other Computers with Vista

How to Share a Local Printer on your Network with Other Computers with Vista

Welcome to another Vista based tutorial!  Today I am going to teach you just how easy it is to share a locally attached printer with other computers on your network.  By locally attached, I mean a printer that is connected locally to a PC via a USB or parallel adapter, and is not connected to a HUB or Router.  We’re going to create the share with Vista, but you will be able to link to the share from any Windows machine.
This tutorial is split into 2 sections… first we will look at how to create the share, then we will look at how to add the shared printer to your other computers.
Shall we dance?

Creating the Shared Printer

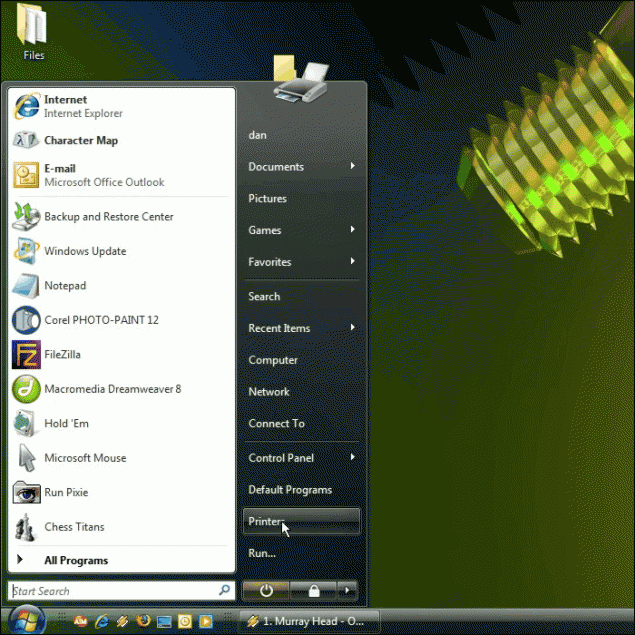
Step 1 – Click on Start > Printers to load the Printers configuration menu:

WARNING: You may have to customize your Windows Start Menu to enable the Printers button so it shows up in the Start Menu like in the Screenshot.  If you don’t want to do that, click on Start > Control Panel to open your control panel and double-click the Printers Icon to access the Printers Configuration Menu.
This is what the Printers Configuration Menu looks like once it’s opened.  It will list any Online or Offline printers you currently have installed:

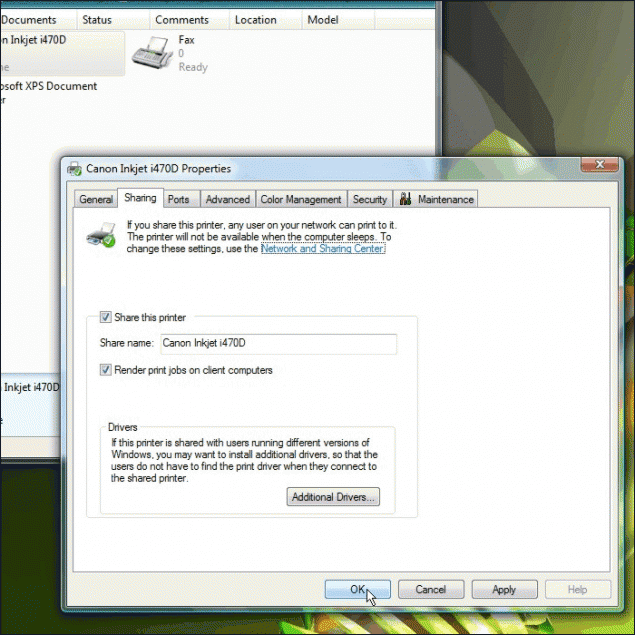
Pro Tip: You can assign a share name if you don’t want to use the default.  You can use any name you want!  You can also attach driver packs, which allows you to install the share from other Windows versions without having to have the drivers on hand from those PCs.  If you don’t add driver packs here, you may have to have the drivers on-hand from any non-Vista PCs you attach to the shared printer.  Not a big deal, just giving you a heads up!
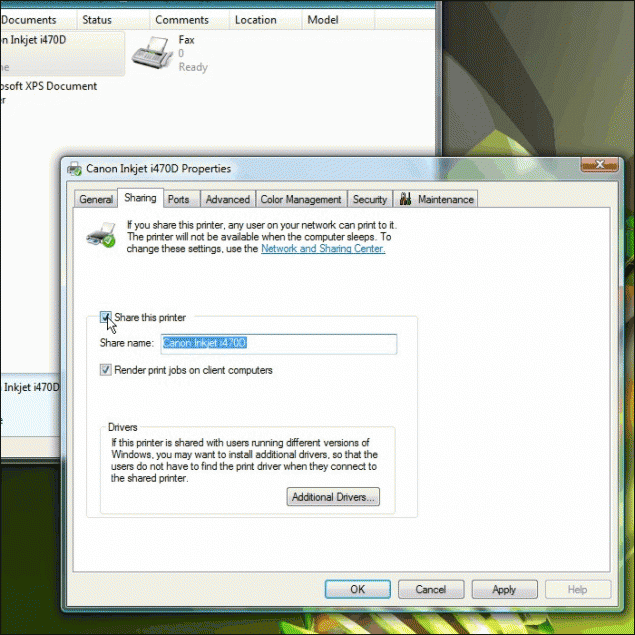
Step 4 – Once you click OK, it will process the Share request for a second or two and then go back to the main Printer menu.  You will notice that your printer now has the Shared icon attached to it:
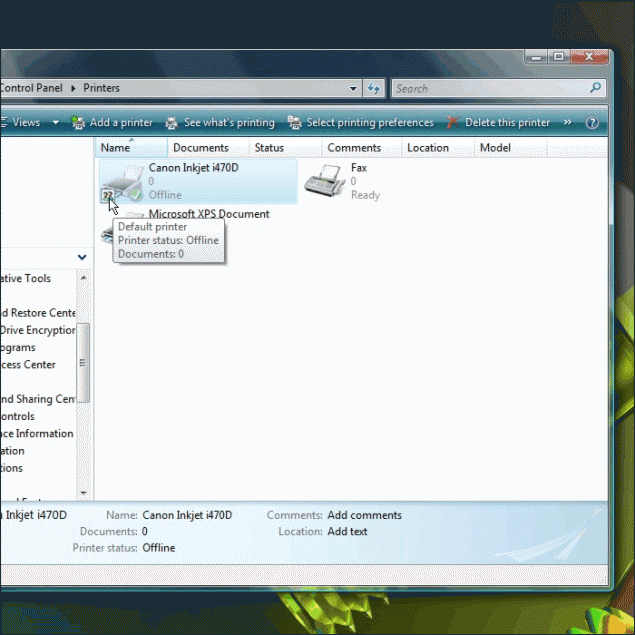
You’re done!  Your printer is now shared and ready for use by other computers on your network.  Let’s look at page two to learn how to add this shared network printer on your other computers!

Adding the Share to Other Computers

Adding the shared Printer is extremely easy, but may vary slightly depending on the version of Windows you are using to add the printer.  The steps will be very similar to the process we’ll use here in Vista, but you may have to install drivers for your OS.

WARNING: If you are going to be adding this shared printer from a version of Windows that is different than the version used to create the share, be sure to download and have the appropriate drivers ready in case your OS requires them.

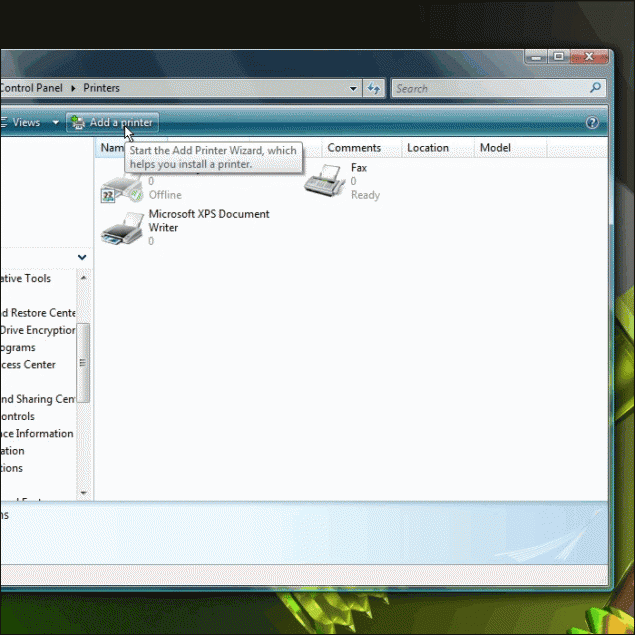
Step 1 – Once again, open up the Printers Configuration Menu and click on Add a Printer:
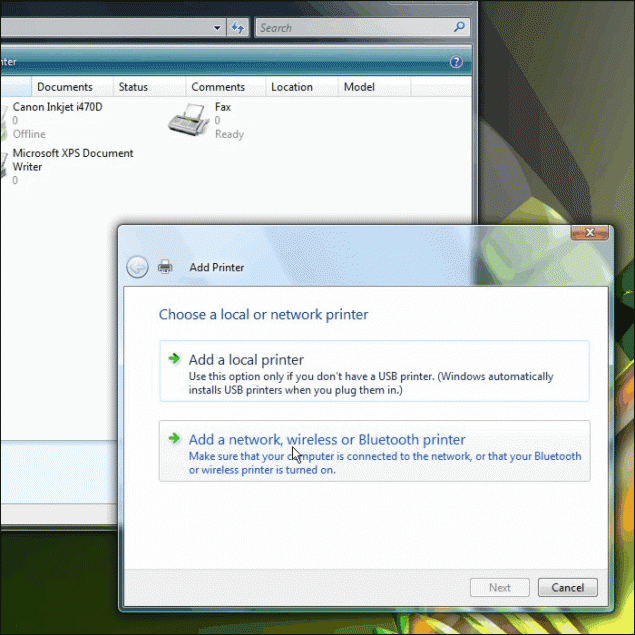
Step 2 – You will then be prompted to select either a local or network printer installation.  Be sure to select network printer!
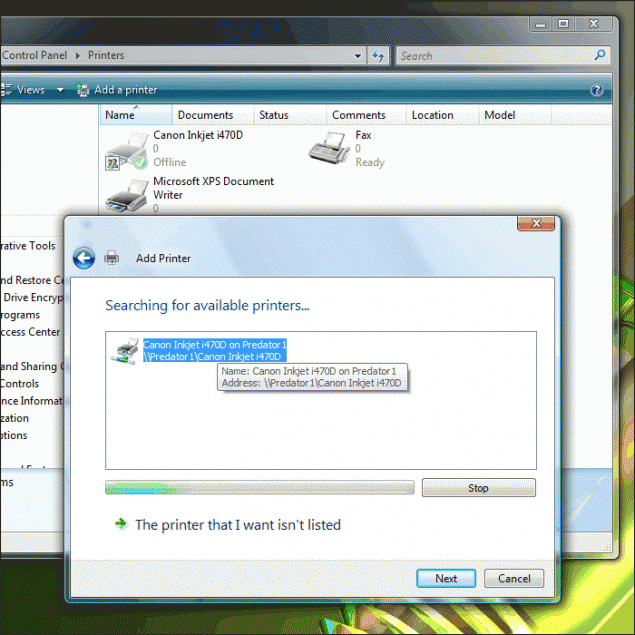
Step 3 – Now this is where things may be different depending on your version of Windows.  In Vista, you will be presented with a listing of available shared printers on your entire network automatically, but others may have your browse a list of PCs with shares attached to them.  If you are using the browse method, just find the network name of the PC that is sharing the printer and double click it and it should show you the printer itself.  Click on that and you’re in business.
Here in Vista it’s pretty straight forward… all you have to do is click the shared printer you want and click Next:
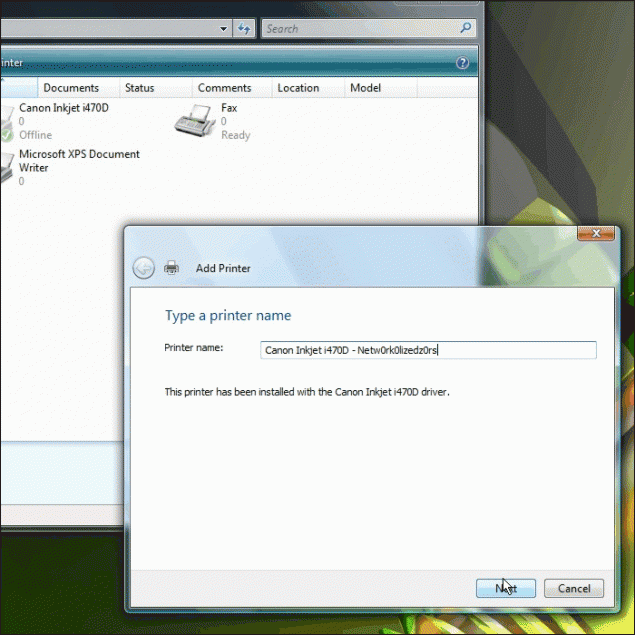
Step 3 – Name your printer to whatever you want or stick with the default and click next:
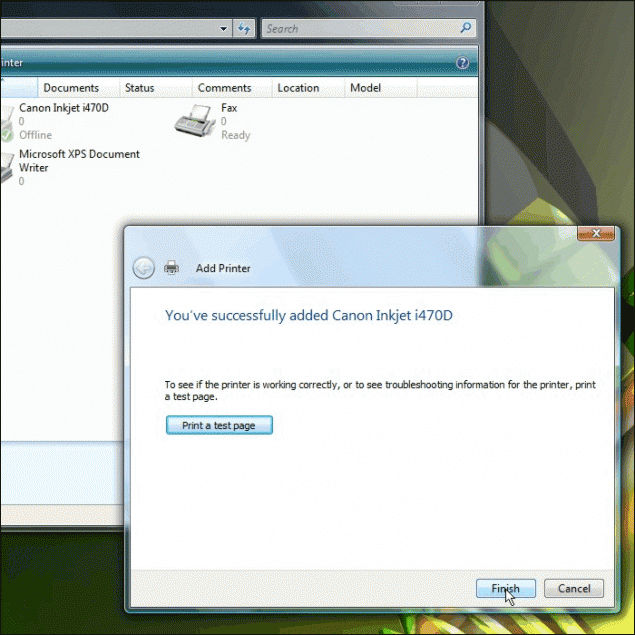
Step 4 – Click Finish and you’re done!  You can also fire off a test page just to make sure your share is set up properly:

WARNING: Take note that the share only works when the PC that is hosting the share is turned on!  If the machine to which the printer is connected is not powered up, your documents will not print from other PCs.
Thanks for reading and I hope you found this tutorial helpful!
Dan
New Policy for Competition Free For All – Read Before Posting a Contest!

New Policy for Competition Free For All – Read Before Posting a Contest!

Hello everyone,

In an effort to protect our members and community, I would like to announce the following policy changes in regards to posting competition announcements in our Competition Free-For-All forum. For those of you that don't know, P2L has a FFA forum dedicated to people that want to run competitions and advertise them on our site. Unfortunately people have seen fit to take advantage of this free service and run contests to score themselves free labor and not deliver on their advertised prizes.

From now on, anyone looking to announce or run a contest on our forums that involves a prize consisting of cash or goods must do the following:

1. Contact me (Faken) via email or PM to advise me of the contest you wish to run with a complete breakdown of the contest (Theme, timeline, prize(s), rules etc…) before you post anything. Unless you have permission from me, do not post a new contest.

2. In some circumstances I will allow you to run the contest with no further questions asked. This will be based on your reputation. If I know you well and feel I can trust you, you will be able to post your contest.

3. If I do not know you very well or do not have 100% trust in your ability to pony up the prizes, you will be asked to use me as an Escrow service. This means that if you are offering cash, you will be expected to send the funds to me in the form of Paypal or certified check or money order. If you are offering goods that you will be shipping to the winner, you will be asked to send the item(s) to me to be held until the winner is selected. I will then ship the items directly to the winner or make the payment. I will require the prize money or items in my possession BEFORE any contest is announced.

If you are asked to use P2L as an escrow, don't be offended… we're here to protect you and the other members of this forum to ensure that all future contests are held with integrity and in a manner that is trustworthy and reliable. If anyone has any concerns or questions about these rules, please contact me directly or post below.

Thanks,
Dan