'Show the P2L Love' Contest Winners!

'Show the P2L Love' Contest Winners!

It's my pleasure to announce the official winners of the Show the P2L Love contest! First off, it was a real blast seeing your entries… some were really nice and others were hilarious, but a ton weren't photos. Tsk Tsk some folks didn't read those rules! I picked out my absolute favorite as the first prize winner, then randomly drew the name from my remaining 10 favorites. So without further rambling, here are our winners:

FIRST PRIZE

This beautiful entry was submitted by Dezept1p, and features a romantic P2L lovin moment taken on the beach at the edge of the Baltic Sea. Pass the Corona!

SECOND PRIZE

They say the way to a man's heart is through his stomach, and Ben Lind hit the nail on the head with his delicious assortment of carefully arranged M&Ms! Now if Ben would be so kind as to send me those M&Ms for ingestion inspection, it would be greatly appreciated.

HONORABLE MENTIONS

We had some great entries from all over the place, and here are some other examples of the great entries we had:

We had folks dismantling their computer equipment:

We had pimpin' P2L DJ's complete with comb and tinfoil teeth bling LOL!

And we had people destroying local foliage:

So that's it gang! Winners will be contacted via email in just a bit to confirm details and congratulations on winning! I'd also like to thank everyone that participated in this contest and I advise everyone to keep an eye open for our next contest, coming VERY soon. I want to give everyone a chance to take home some loot, so we've got LOTS more coming!

Until next time,
Dan

How to create a diagonal opening blinds transition effect for images in Flash

How to create a diagonal opening blinds transition effect for images in Flash

Introduction

Welcome to my first tutorial in quite awhile!  Today I’m going to crack open something I haven’t used in a VERY long time, and that’s Flash.  For those of you unfamiliar with my design background, I was a very heavy Flash designer and used to be quite specialized in ActionScript and coding massive desktop emulation style web layouts entirely in Flash.  I’ve also put together many presentations and movies with Flash, and sometimes it’s fun to crack it open for a few minutes and mess around before I’m reminded how tedious working in Flash is and I close it for another year or two.  In fact, when I stopped developing in Flash as a primary focus, it was back when Flash 5 was just being launched, so that gives you an idea of how long it’s been.

But with that said, it’s very much like riding a bike… you still remember how to do it even if you haven’t touched it for years.  I have to admit the advanced ActionScript I once lived and breathed like a religion has complete slipped my memory beyond the Geturl and Stop commands, so luckily today I am going with a strictly animation style tutorial.

The first thing I want to mention is that my programmers love to giggle at my complete ignorance when it comes to PHP and other joys of website coding, and I’m fairly sure they do it on purpose to give me cryptic and code filled answers when I ask why something is broken and see if I pretend to understand.  They might as well be clicking it out in Dolphin speak, as I’d have equal chances of understanding anyhow.  So you can imagine the satisfaction when one of my friendly programmers asked if I still did Flash and if I knew how to re-create an effect he had seen on another website.  It was a fairly simple transition effect and I knew instantly how to go about it. which I started hammering out in MSN.  This was met with a confused mutter by the programmer who was clearly getting a taste of his own medicine.  So without much nose rubbing, I quickly made him an example and thought I’d share this with everyone in the form of a tutorial.

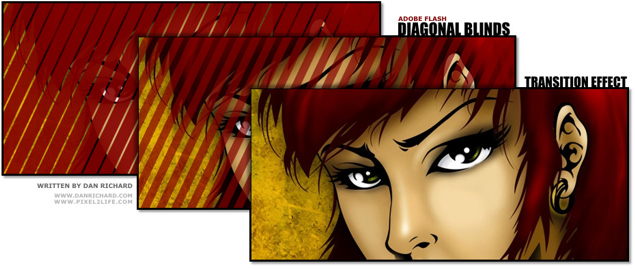
What we are going to do is create an animated transition effect where it looks like a diagonal row of blinds is opening to reveal an image below.  This can be used when loading a site banner, for buttons or as a photo gallery transition effect.  Granted I’m going to be a tad sloppy about this, but you can create some very clean versions of this by using more masks to control the overflowing lines and such.  I’ll also show you a couple of variants on this effect by adding a fade out as the blinds open.

Tools

For this tutorial, I will be using Adobe Flash CS3, but this technique can be used in any version of Flash, it’s all the same.

I would also like to give a shout-out to my friends at GoMedia.com, which is where I got the wallpaper I am using for this tutorial.  Check out their stuff, they’ve got some WICKED artwork in their portfolio and some gorgeous Vector Packs, Texture Packs and more you can purchase, as well as some free goodies.

We’ll also have some project files for this tutorial, which are demo packs that include the .FLA, .SWF, and .HTML files needed to view each step.  To use these packs, simply unzip the contents to a temp folder and you can either open the HTML file or the SWF file directly.  Here are the files, which I will repeat when they become relevant to the tutorial:

File Download: Project Files 1
File Download: Project Files 2

Experience Required:
Since this is my first Flash tutorial, I’m going to make it very basic and assume you can barely navigate Flash.  Each step and each click will be documented, but any future tutorials will assume you know how to perform simple tasks like creating new layers, converting items, working with frame functions etc.

All set?  Just strike a pose, there’s nothing to it, VOGUE!

Read More Read More

1 More Day to Show the Love! Enter the P2L Show the Love Contest TODAY!

1 More Day to Show the Love! Enter the P2L Show the Love Contest TODAY!

Hey guys!

Just a reminder the P2L Show the Love contest is over tomorrow, Monday September 10th at 11:59PM EST so be sure to get your entries in! We haven't had a ton of entries so the chances of winning are pretty high, so move your butts and show the LOVE! Get all the details at http://www.pixel2life.com/forums/index.php?showtopic=36800

Dan

New Share It Box for Social Bookmarking Launched on P2L!

New Share It Box for Social Bookmarking Launched on P2L!

I'm very pleased to announce the implementation of a new toy for you social bookmarking folks out there! We've added a new Share It! link on all tutorial records that allows you to quickly share a tutorial on your favorite social bookmark sites. Simply click the Share It! link and you can quickly submit to the following sites:

del.icio.us
Digg
Furl
Netscape
Yahoo!
My Web
StumbleUpon
Google Bookmarks
Technorati
BlinkList
Newsvine
ma.gnolia
reddit
Windows Live
Tailrank

Enjoy the new widget and let me know if you experience any problems!

Thanks,
Dan

New quick Digg link added to tutorial records!

New quick Digg link added to tutorial records!

We've added a quick Digg button to the tutorials and we’re working on a nifty popup style sharing box that will quickly allow you too bookmark tutorials on social networks on the fly with all your favorite sites. Adam will be working on this tomorrow so we might see this up and running by Sunday night if all goes well, just keep an eye on the news for the announcement.

As for the Quick Digg link, you�ll see the little dig shovel guy icon next to the report and fave icons on each tutorial record. Click this to Digg that tutorial on the spot! Bear in mind that if you are the first person to Digg that tutorial, you will have to submit it to Digg.com first to register your Digg.

The new share box will allow you to post to Del.icio.us, Reddit, Technorati and more!

Enjoy and have a great weekend guys!

Dan