Browsed by
Category: Tutorials

How to Stop SPAM on Your WordPress Blog Using the Akismet Spam Plugin

How to Stop SPAM on Your WordPress Blog Using the Akismet Spam Plugin

There is a Digg for this article HERE.

Now that I have installed the Akismet Spam plugin to help control the ridiculous amounts of Spam that was being thrown at my blog, the queries are pouring in about what Akismet is and how do they install it too! Turns out that Spam is just an insane issue right now on WordPress blogs, and it seems like Spam bots are out of control. The only real way I found right at first to control this was to force people to register in order to post comments and this cut down the spam quite a bit. Unfortunately I know that I lost a lost of feedback because most people don’t want to register just to post a hello or a one sentence comment.

Akismet

So how do you solve this Spam issue without forcing people to register? Well, you install the most popular and effective Span control plugin currently available online called Akismet! Did I also mention it’s 100% free for personal use? If you want to learn more about what Akismet actually does and how it works, check out their FAQ.

This tutorial will show you step by step how to install the plugin and get your free WordPress API key in order for it to work for your personally hosted blog. If you host your blog at WordPress, then you don’t need this because your blog is automatically protected by Akismet. If you host your own blog(s) like I do, you need to install the plugin manually. Click below to continue!

Read More Read More

3D Text in Corel Photopaint – Create a 3D Text or Object Effect without a 3D App!

3D Text in Corel Photopaint – Create a 3D Text or Object Effect without a 3D App!

We’ve probably all seen how to perform a basic 3D text or object effect in Photoshop tutorials, but I recently received an email from a P2L user who wanted to know how exactly this would be pulled off in Photopaint. It’s actually the exact same process, but of course, I added a few embellishments. The basic principal behind this tutorial is simple… create some text, then just copy/paste it in about 10 layers under the main text and move each layer 1 pixel vertically and horizontally from the one above it to create the 3D look. It’s a popular effect, and it’s very easy to do… we’ll jazz it up with some gradients just to go the extra mile.

In the end, we’ll up with this 3D text:

user posted image

Bear in mind, this doesn’t just apply to text… you can do this for any object that has an initial 2D appearance. We’ll complete this tutorial assuming you know how to use the Interactive Object Transparency Tool, alter Brightness and Contrast and a few other basic tools. If you’re not sure how to use these tools, please read some of my older tutorials that cover these items in more detail.

Read More Read More

Pixelation and Mosaic Effect used on Pixel2life v1 banner in Photopaint

Pixelation and Mosaic Effect used on Pixel2life v1 banner in Photopaint

Due to popular demand, I’ve decided to create this tutorial to answer the many emails I’ve received on how to create the pixelated effect you used to see on the main banner at www.pixel2life.com when we were running version 1. Now here’s the part you’re not going to like. This wasn’t done in Photoshop! (You’re thinking OH NO!!!) As a few people already know, I do not use Photoshop for anything unless I really have to, as I am a Corel Photopaint Junkie. I’ve been using Photopaint since Christ was a cowboy, so I stick with it. Luckily, Photopaint and Photoshop are so identical, I’m sure you can re-create this effect in Photoshop without much trouble. So without further delay, let’s get on with the show. By the way, this is my first official tutorial ever, so hopefully I don’t botch it up too badly. You should have at least a beginner’s knowledge of Photopaint to properly execute this tutorial, otherwise some terms may be confusing. I’ll try my best to explain each step. Here’s the effect we want

user posted image

Read More Read More

Glass or Shiny Plastic Interface Orb in Photopaint

Glass or Shiny Plastic Interface Orb in Photopaint

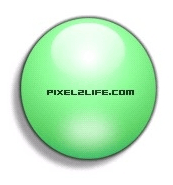
We’ve all seen them! Those glass orbs that I myself am currently addicted to making but for all you Photopaint users, you were sh** out of luck finding a tutorial on how to make them! P2L itself has dozens of orb tutorials for Photoshop, but what about the few and proud Photopaint people?! Well I’ve come to put you out of your misery! Here is how I make my Glass or Shiny Plastic interface orbs in Photopaint! There are tons of variants when doing this, so feel free to play around as you go. Here’s what we’re going to make:

user posted image

The orb has a number of subtle effects that combine to create the illusion of shiny glass or a plastic surface, so we’ll go through each filter step by step. Lets dance!

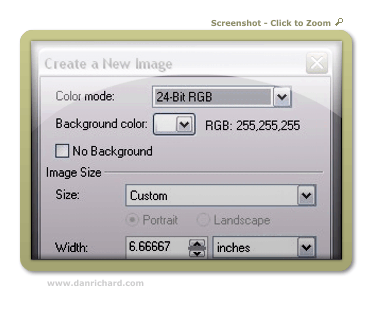
Step 1: Let’s start off by creating a new document. Here are my personal preferences whenever I’m making a new graphic that will be web or screen based. (Create a new document by clicking on File > New or Ctrl-N)

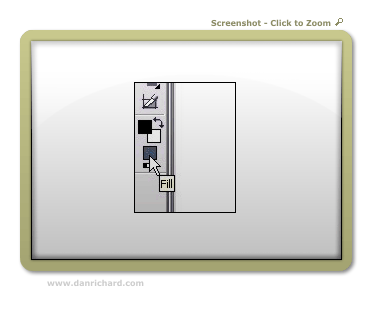
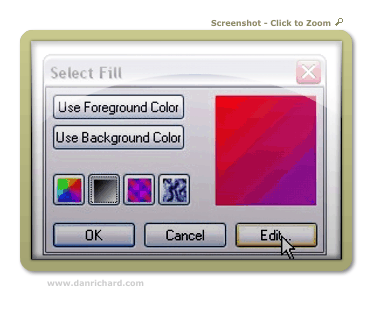
Step 2: Now to create the base gradient color of our Orb. Double-click on the fill color on your toolbox bar to open the Select Fill box.

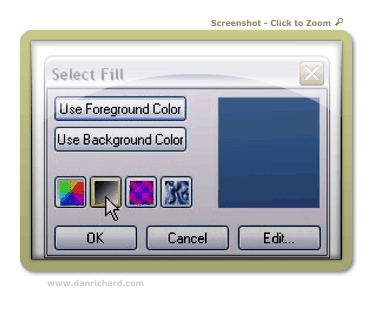
Step 3: Once the Select Fill box opens, click on the gradient button and click edit

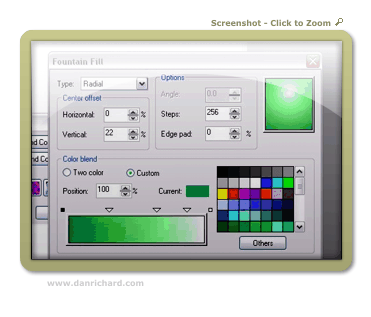
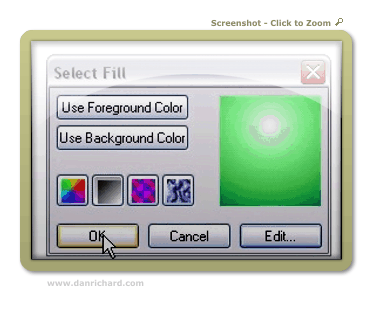
Step 4: Here’s where the fun starts. You can click on the Presets arrow and scroll through a number of preset Circular configurations. For this tutorial, I chose the Green 01 Preset and I set the Horizontal percentage to 0% and set Vertical to 22%. I left the colors default, but you can change any colors by clicking on the arrow just above the color and click on others. The little squares just above the ends of the color blend bar are the start and end colors. You can change those as well by clicking on the box and click Others. You can add additional colors by double-clicking on the square and moving the new arrow into the desired position. The preview box on the top right shows you the changes as they happen. So pick your colors, be sure to use a Radial Type and click OK. This will bring you back to the Select Fill box. Click OK to close it.

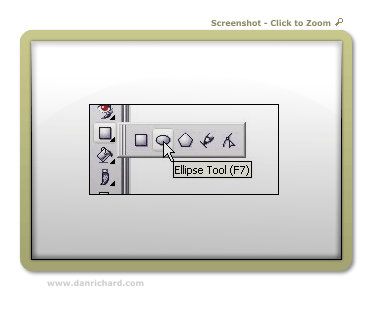
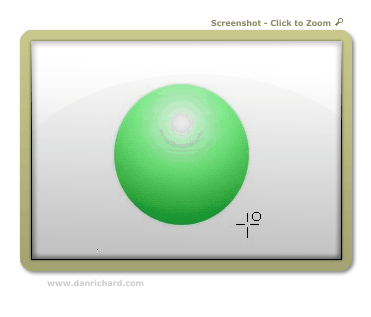
Step 5: Time to draw our orb! Select the Ellipse Tool from the Toolbox bar or simply hit F7.

Step 6: Click and hold the mouse button and drag the mouse over to create the circle. Release when the desired shape is achieved. If you only get an outline or the circle doesn’t appear, be sure to check your shape tool settings and make sure Fill is on and Outline is off.

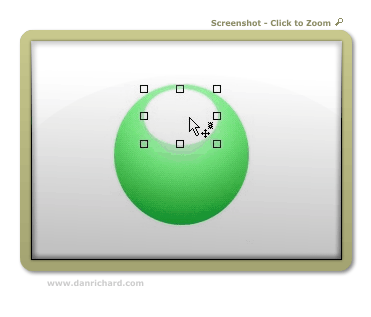
Step 7: Now, change your fill color to white by right-clicking on white on the color palette and draw a second Oval Ellipse on top of the orb. This will be the shine on top of the orb.

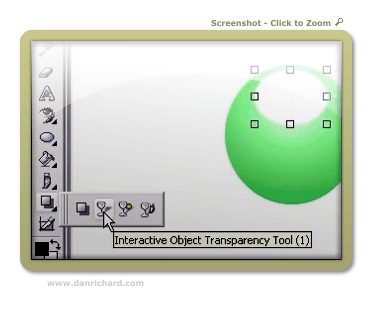
Step 8: From the toolbox bar, select the Interactive Object Transparency Toll (Or type 1)

Step 9: Click and hold the mouse button at the top of the shine and drag your mouse to the bottom. Release the mouse button and right-click on the image and select Apply. You will now have the shine effect on your orb. It’s a bit bright for my tastes, so lets tone it down a bit in step 9.

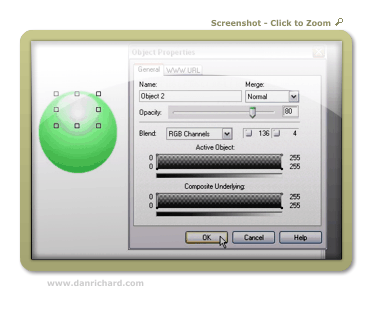
Step 10: Right click on the shine and select Object Properties. Change the opacity to 80 to tone it down just a bit and click OK.

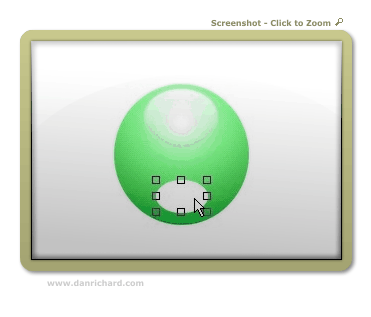
Step 11: Now create another white oval with the Ellipse tool at the bottom of the orb a bit smaller than the oval we created for the shine. This is an optional step that will create the “inner glow” effect on the orb.

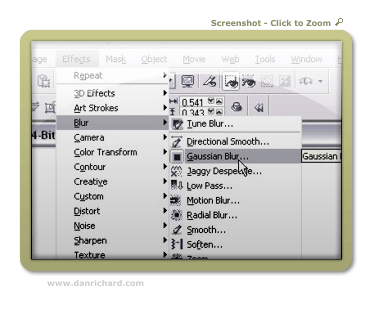
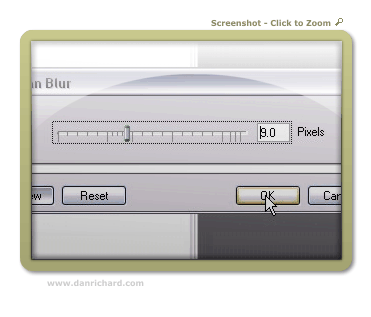
Step 12: Now we apply a Gaussian Blur to the new oval to really blend it into the orb. Here are the settings I used in this tutorial – just click OK when you have it set to what you like.

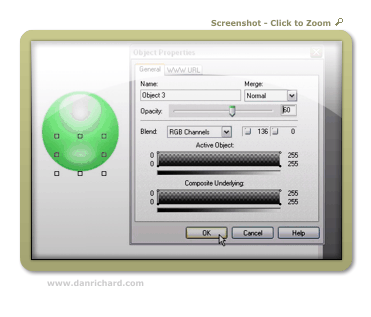
Step 13: Now right-click on the inner-shadow oval and set that opacity to around 60. We don’t want this too bright or the effect is somewhat lost. Different colors require different opacity, so you’ll have to play around to get it to your liking.

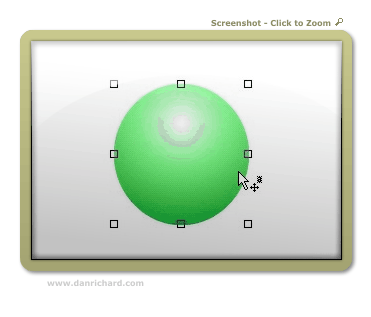
Step 14: Now for the finishing touches. We’ll create a small dark rim around the orb to “sink” it into the page a bit. Click on the main orb to select it with the Object Pick Tool (Type O) and hit Ctrl-C then Ctrl-V to copy/paste a new one on top of the other objects.

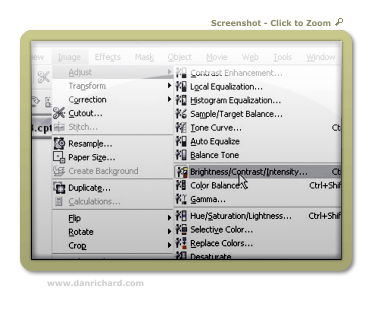
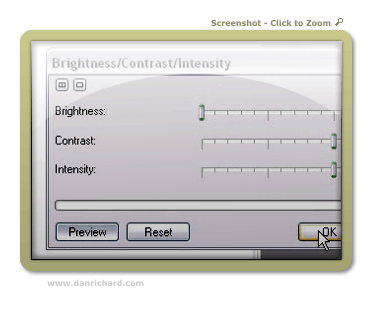
Step 15: Now we want to completely darken the image for our sink in effect. You can do it by either selecting black as your fill tool and bucket fill the object, or as I like to do, click on Image >Adjust > Brightness/Contrast/Intensity (or type Ctrl-B) and turn the brightness all the way down. Just a weird habit I picked up someplace.

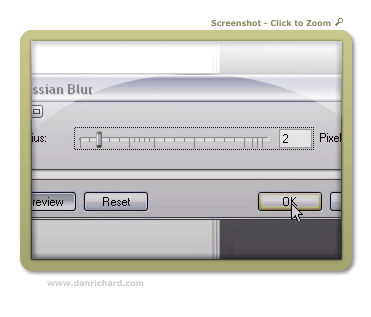
 Step 16: After you click OK, you’ll then have a black circle on top of your orb, shine and inner glow. You’ll need to apply a Gaussian Blur to the black circle with about a 2 pixel radius. Click OK to apply the blur.

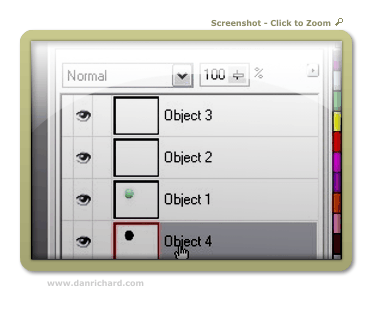
Step 17: Now grab the Black Circle object in your Object Docker (You can open the Object Docker by clicking on Window > Dockers > Object Docker) by clicking on the object and holding the mouse button down. Drag it all the way to the bottom of the object list and release. The circle is now under your orb and detailed effects. Do another copy/paste of the black circle and move the second one to the bottom of the list.

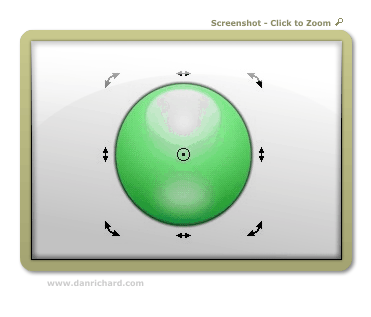
Step 18: Here’s where you should be at so far! Almost done… now let’s add some final details and call it a tutorial 🙂

Step 19: In my final version, I added some text in the center and a simple drop shadow. The drop shadow can be done the same way as Step 11, but just turn down the opacity of that third black circle to about 50 or 60%. Enjoy your orb making!

user posted image

Thanks!
Dan

Please be sure to check out my complete tutorial list for more great articles!

Blended Text Tutorial – Create Text that Blends into your Sig’s Background in Photopaint

Blended Text Tutorial – Create Text that Blends into your Sig’s Background in Photopaint

We’ve all seen the tutorials all over the place on how to blend text into the grunge or 3d render background of sigs in Photoshop. This style is extremely popular these days and looks great for pretty much any kind of background. In fact, to emphasize this point, I’ve randomly selected a background from one of the tutorials in the P2L index to show you how this can be done with any image in Corel photopaint!

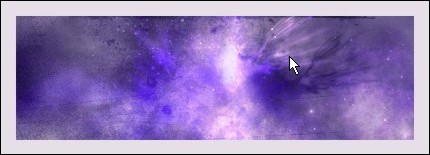
For this tutorial, I’m going to use the background effect in this Photoshop signature tutorial titled Star Explosion – Create this interesting Exploding Star / Nebula effect. Here’s what it looks like.
Here’s how to add your blended text:

Step 1: With your image open in PhotoPaint, select the Text tool (Type ‘T’) and add some text with decent width and size.  Don’t make your text too tacky by going HUGE, but keep it a good size so the effect comes out properly.  If your text is too thin, the effect is lost somewhat.
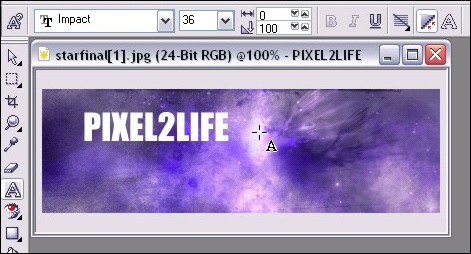
Step 2: Once you’ve completed your text, create a mask from the text (Mask from Object) by hitting ‘Ctrl-M’ and this will form a mask around your text.
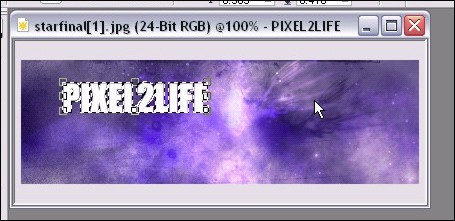
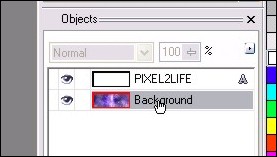
Step 3: In your object docker, select the background by clicking on it once or simply click on the background itself with the Object pick Tool (hit ‘O’).  This will ensure that the next steps will apply to the background rather than the text object.
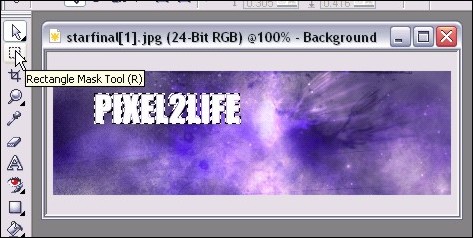
Step 4: Select the Rectangle Mask Tool by hitting ‘R’ – this will then tell PhotoPaint that any further steps will be applied to whatever is within the mask on the current object rather than the entire object currently selected, which is the background at the moment.
Step 5: Now you need to run a quick copy paste… you can either hit the copy icon, then the past icon, or use the hotkeys, which are ‘Ctrl-C’ then ‘Ctrl-V’.  This will make a copy of your text, but using the background, and it will become your top object.
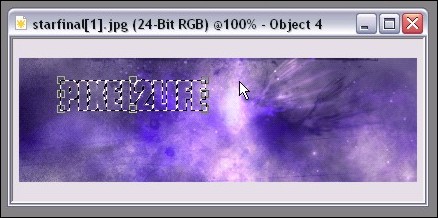
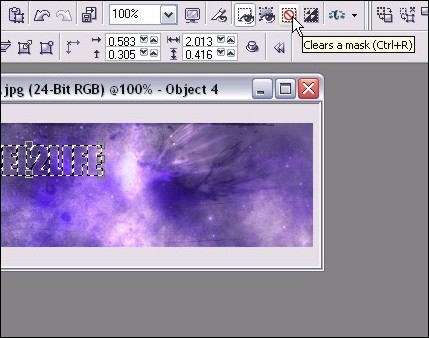
Step 6: Clear the mask by hitting ‘Ctrl-R’ or clicking the Clear Mask Icon.  One the mask is cleared, any additional steps will apply to the entire object rather than just what’s within the mask.
Step 7: Time to start playing with effects to bring out the text from the background.  We want it to be blended, not completely invisible!  To start, we’ll apply a plastic texture effect to our new object by clicking Effects > Texture > Plastic from the main menu.  Here are the settings I used for this tutorial, but feel free to play around.  You can really achieve a variety of blending strength by playing with the depth and highlight settings.
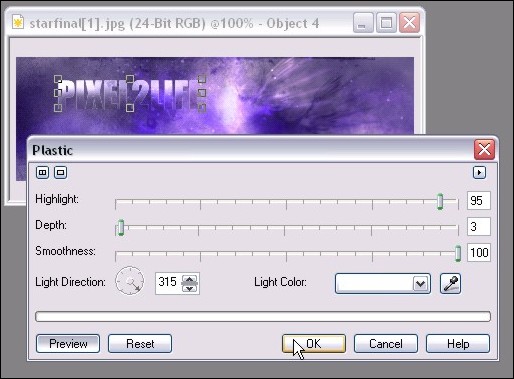
I have previews turned on so you can see what the effect looks like before actually applying it.

Step 8: We’ll want to add a slight Emboss to give the text a nice subtle 3D enhancement with shading.  You can do this by clicking on Effects > 3D Effects > Emboss from the main menu.  Here are the settings I used, but again, play around until you find something you like:
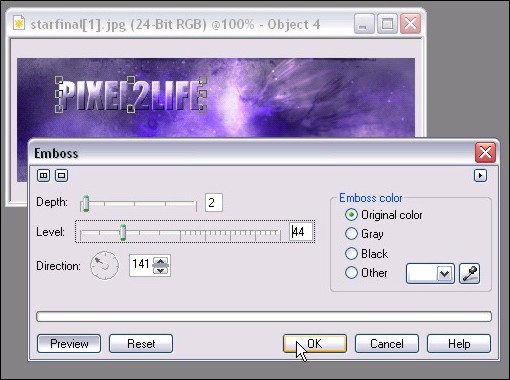
Step 9: At this point, let’s not forget we have the original text that we typed out in Step 1!  We’re going to use that text to add a subtle dropshadow to our text.  This will help bring out the text just a tad more to ensure it’s at least readable.  This is especially effective if the text is a bit slimmer.

So once again go to your object docker (If you don’t have your object docker open, you can do so by clicking on Windows > Dockers > Objects on the main menu.  You still won’t see it because the blended text is over it, but now we can apply some effects to it.
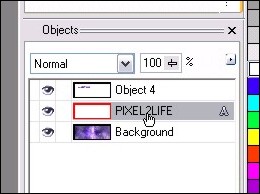
Step 10: Let’s darken up that text so it can be used for a dropshadow.  Click on Image > Adjust > Brightness/Contrast/Intensity or just hit ‘Ctrl-B’ to bring up the adjustment tool.  Move the Brightness bar all the way left to make the text back.
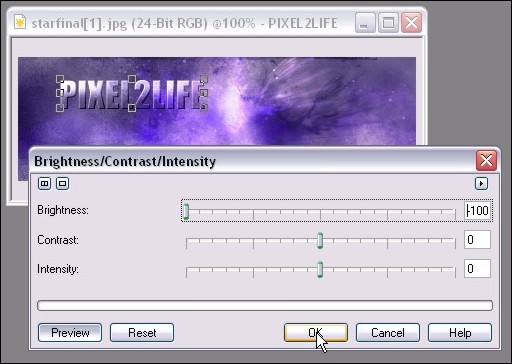
Step 11: One you have that done, we’ll apply a slight blur effect to the text to help blend it into a shadow that doesn’t have a harsh line.  Click on Effects > Blur > Gaussian Blur from the main menu to apply the blur.  You probably want to use a setting of 1 – 3 pixels, but as usual, feel free to play around!  Here’s what I used:
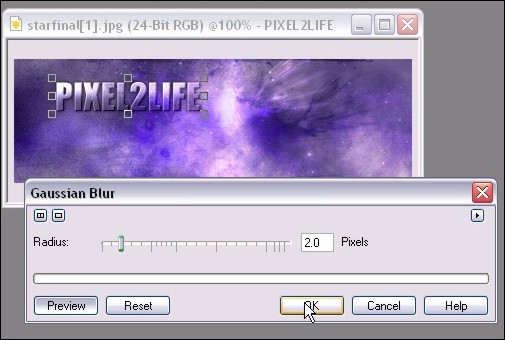
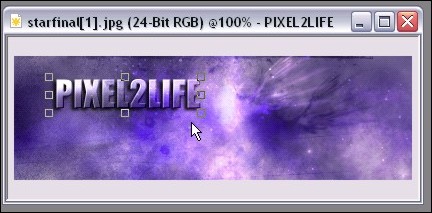
Step 12: We’ll now move the shadow into place.  For this tutorial, I simply moved the object a couple of pixels to the left and down.
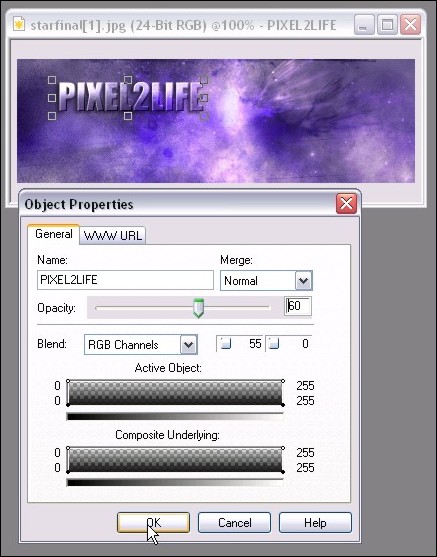
Step 13: The shadow is a bit dark, so we’ll add a transparency to soften it a bit.  Simply right-click on the shadow and click properties to bring up the properties window.  I used a value of 60%:
Step 14: We’re DONE!  That was pretty simply huh?  For additional dramatic effect, we can add some new elements to bring our the text such as a lens flare.  I added a Northstar 4-Point Flare for the heck of it:
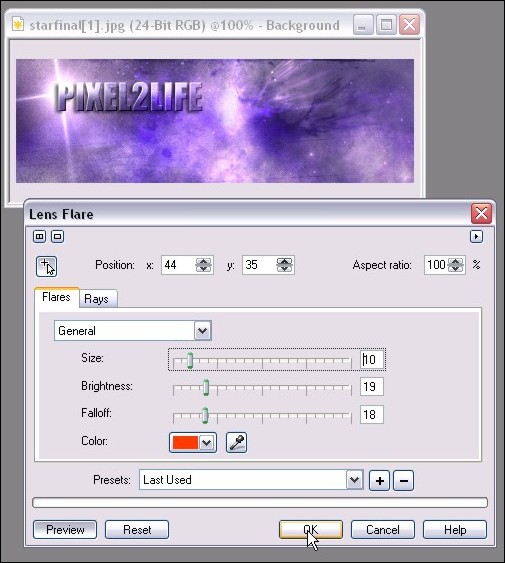
Final Image:

Hope this helps you Corel folks 🙂  Please post any questions!
Dan