Corel Photopaint Nib Error Explained… and it’s still a bug in X3!
Hello everyone! Today I was giving some serious contemplation to upgrading to the latest version of CorelDraw Graphics Suite, which is the X3 version. An upgrade is $200, so that’s a pretty good deal, ESPECIALLY if the Nib management issues are fixed. So I called up Corel Support and asked and they suggested I download the fully functional 15 day trial version. I did, and guess what? Yep… the exact same issue is there and I’m really disappointed. So I’m now going to document this error for their support engineers (as per their request) so they can hopefully resolve the problem, and you guys will know what I’m talking about when I complain about the Nib management issues.
First off, the ability to have custom Nibs is VITAL to your productivity and I am absolutely shocked at how dismal the Nib management is in Photopaint and that this bug is over 4 years old and still not fixed. Hopefully by creating this walk-through, the good folks at Corel can fix this. I love brushes and I used hundreds, if not, thousands in Photoshop and the Photoshop brush management rocks (Photopaint Nibs work like Brushes in Photoshop). I won’t be upgrading until Corel can fix this… it’s really that important.
Please note that for this lesson, you can click any screenshot thumbnail to get the full version.
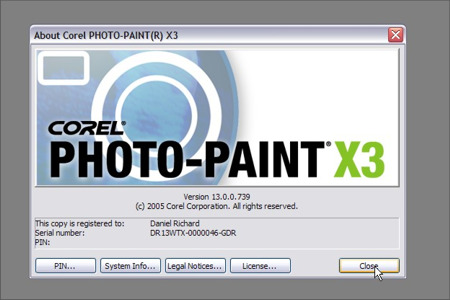
First off, let’s just confirm the version I am working with. I performed a fresh download and install today (January 21st 2008) of Corel Graphics Suite X3, version 13.0.0.739 trial edition. The trial is a fully functional 15 day trial version, that is supposed to be fully patched with the latest service packs and fixes and has no limitations at all for the 15 day trial period.
I have not customized the functionality in any way… this is literally a brand new install and I have not played with the settings aside from turning off color management.
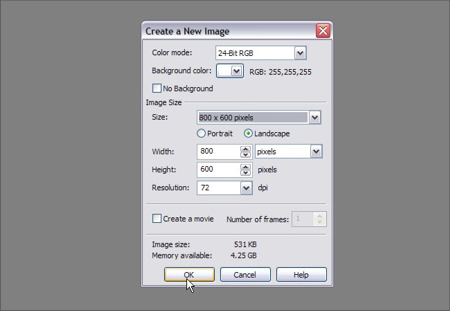
The first thing I am going to do is create a new 800×600 pixel document with a white background.
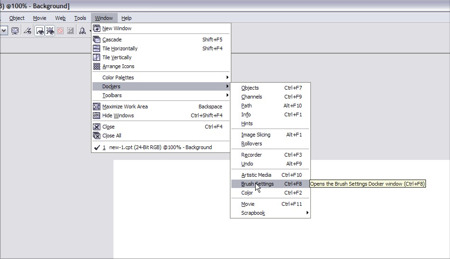
Next, we will need to open up the Brush Settings Docker so that we can access the Nib Management functions. Simply click on Window > Dockers > Brush Settings, or hit Ctrl-F8 and it will open the docker… note that the docker will be blank until you access a brush tool.
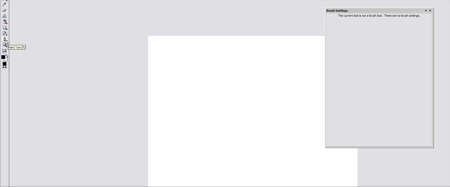
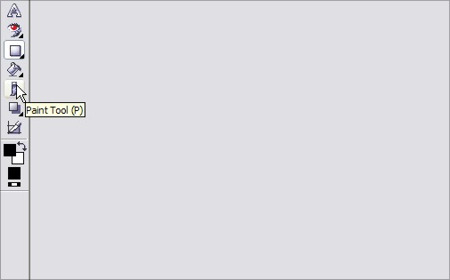
Here you can see the docker is blank, so click on the Paint tool, or hit P:
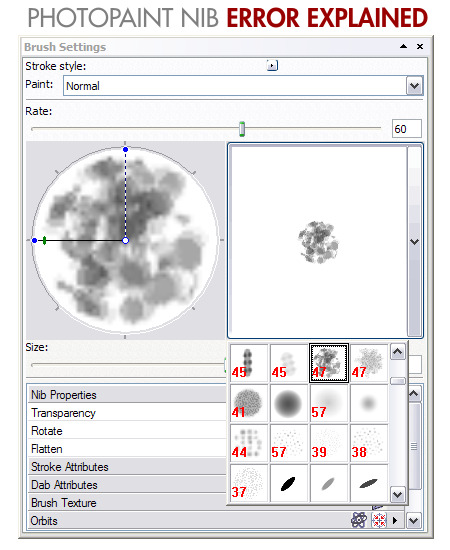
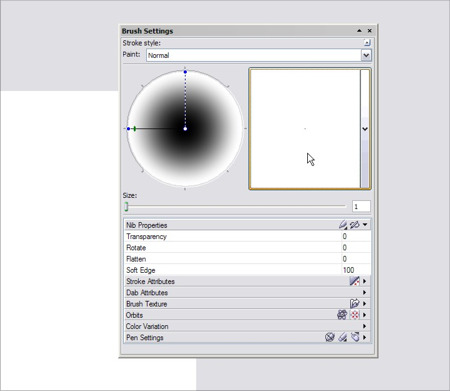
After clicking P, you will see the docker is activated and you can now see the brush settings and the currently selected brush. The round circle area on the docker allows you to rotate and skew the brush, and the square shows you a preview of what the brush looks like.
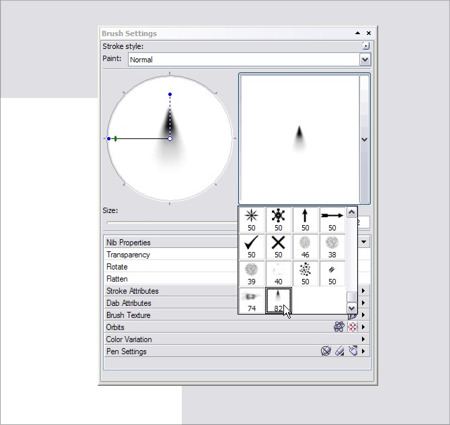
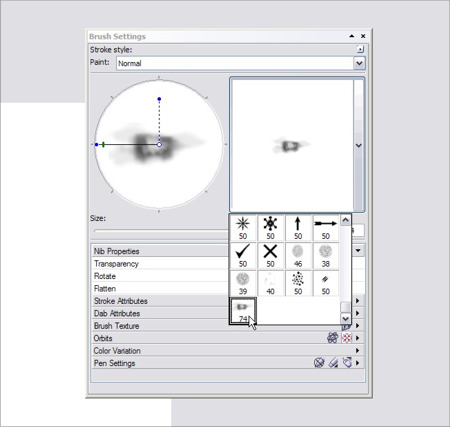
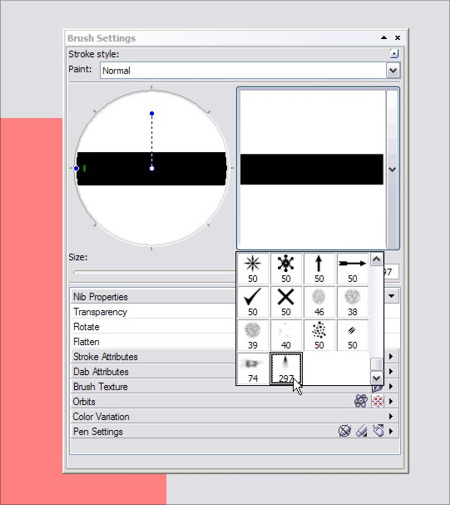
When you click on the square, it will show you a list of all the current installed Nibs in this file… scroll all the way to the bottom and select the last Nib in the pack. In my case, it’s Nib 82 and it’s a spray mist style brush. TAKE SPECIAL NOTE that the small thumbnail in the list AND the larger thumbnail in the square preview box MATCH.
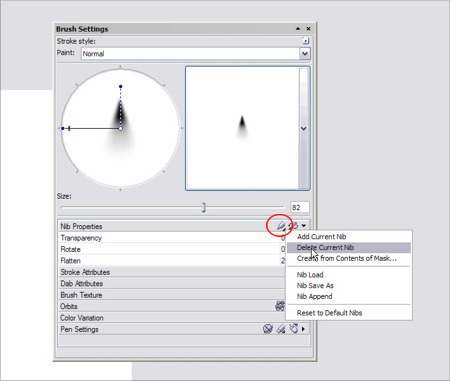
Now, for this example, I want you to delete this Nib… you can delete just this Nib or you can delete all of them, the bug will be present either way. To delete the Nib, click on the Nib Options button (circled in red) and click on Delete Current Nib:
Now, scroll down the list again and you will see that the Nib 82 is now gone and Nib 74 is the last on the list. So far, everything is normal…
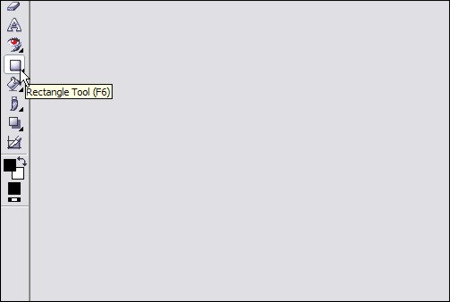
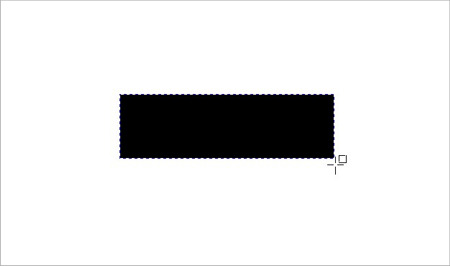
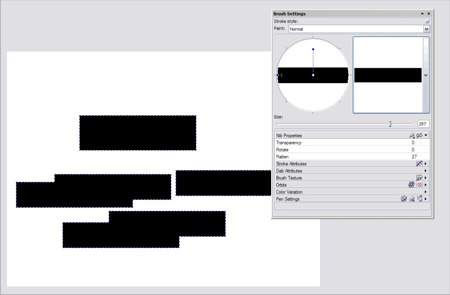
Now, in order to start running in to problems, we’ll need to add a new Nib to our collection. Now you can download masked PNGs and such to create nibs, but for the sake of this sample, we’ll keep it very simple and just add a rectangle shaped Nib to our list. To do this, start by selecting the rectangle tool and drawing a rectangle on our canvas:
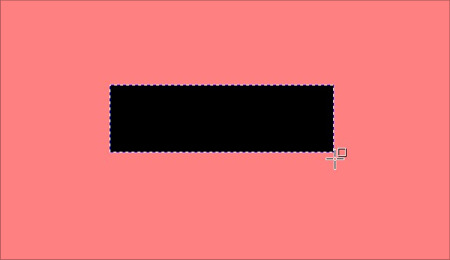
Once you have your shape, we need to mask it, so hit Ctrl-M and this will automatically create a mask around the rectangle:
Now click on your paint tool again so we can access the Nib options in the docker:
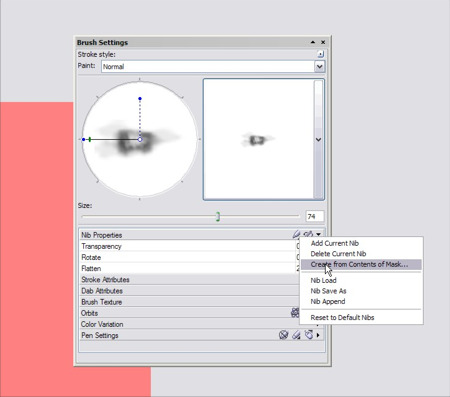
Now we can add the Nib! Simply click on the Nib Options button again and click on “Create from Contents of Mask…”:
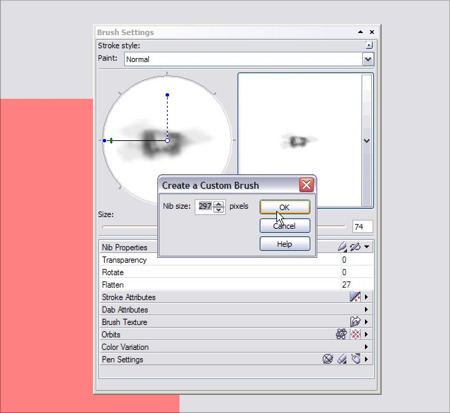
It will then ask you what size to make the Nib… just leave it at the default and click OK to proceed:
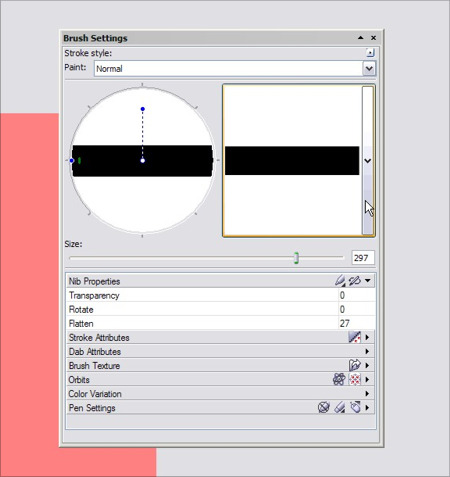
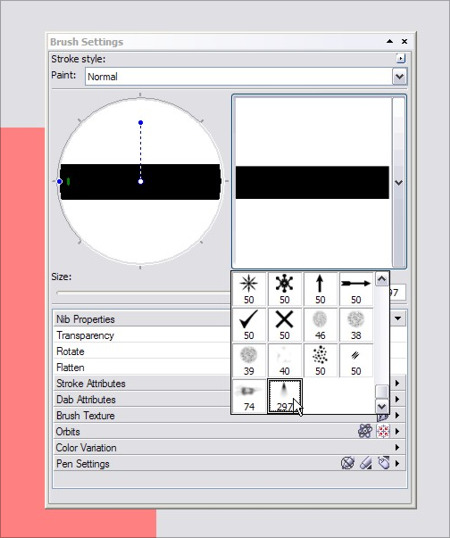
And VOILA! We have our new Nib ready to go! Note that the square preview area shows the rectangle Nib:
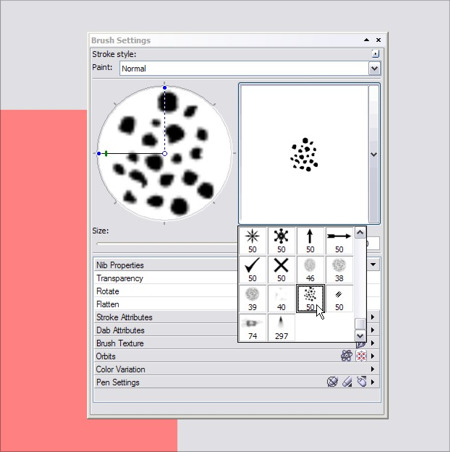
But now we have a problem… Click on the square to show your list of Nibs and scroll to the bottom… the mini thumbnail to the new Nib is wrong, it’s showing the the old Nib we deleted. But yet if you click on it, you get the rectangle brush!
Even if you click on another thumbnail and then try again, it’s still wrong… the new Nib is not showing the correct mini thumbnail.
You can see the Nib works, but the thumbnail is wrong:
So that’s how the bug is created… the mini thumbnails in the Nib selection list is not refreshing properly… it’s using the original nibs that were previously in that slot. Now, for 1 Nib it’s no big deal, but imagine if you had dozens or hundreds all doing this??
Now here’s the deal why some folks may not notice this… if you do NOT delete any of the preinstalled Nibs that come with Corel Photopaint and you simply add Nibs to the pack, the new mini thumbnail will be fine. But here’s where things get ugly… if you add a dozen or so, you’re fine, but what happens if you want to use hundreds of custom Nibs? Nibs after all are HUGE time-savers, and in the world of business, money is time. Well, this would be all find and good, except for one major problem. The Nib file has a limitation, and it’s well under a couple hundred Nibs. Once you hit that limit, you’re screwed because the only way you can add more Nibs is to delete old ones, and then you run in to the mini thumbnail issue.
I’m not sure what exactly the limit is… I did hit it once when I first found out about all these problems but it was once I hot either 100 or 200 Nibs and it basically said I could not add any more Nibs and to delete some to add new ones. Now, this wouldn’t normally be a huge deal, because you can save and load .NIB files… this means you can have unlimited amounts of .NIB packs, each containing 100 – 200 Nibs. Well, the theory sounds nice, but even if you load up a new .NIB file at this point and you start adding nibs, they will all have the mini thumbnails that you original maxed out Nib pack has!!!
The only way to deal with this is to simply create nib packs and give them sensible filenames like flames.NIB, and grassbrushes.NIB… when you load them, all the thumbnails will still be wrong but at least you know which pack has what Nibs, and you can scroll through them in the Preview area until you find one you want. It’s a pain, but it’s the only way around it unless Corel fixes it. What’s worse is that you have to start using the Brush Docker all the time because the little quick Nib selector in the toolbars up top use those mini thumbnails that are wrong.
So that’s it… that’s the bug and that’s what I hope Corel fix for the next version or next service pack.
HOWEVER, I think I should also address something to Corel engineers that they can hopefully act upon. Some of us (like me) would like to be able to distribute .NIB packs to other Corel Photopaint users… heck maybe we can get more Photoshop users to check out this amazing package. But we can’t because not only are the thumbnails not working, but we have no of creating a new and blank .NIB File! So to create a Nib pack for distribution, we first have to do a “Nib Save As”, tediously delete each Nib one at a time, then add the custom Nibs we want. So as an improvement, it would be REALLY nice if one of the options under the Nib Options button was “Create New Nib File” or something.
These two improvements to the Nib Management would transform this entire aspect of the software from frustrating and borderline useless to absolutely awesome!
Thanks and I hope this gets some TLC from Corel!
Dan
16 thoughts on “Corel Photopaint Nib Error Explained… and it’s still a bug in X3!”
Although I prefer the Photopaint UI instead of Photoshop, you can’t actually draw with this software. It’s ok for editing pictures, especially if you have some extra plugins… Lots of tools, most of them smarter than Photoshop’s… (feather with INSIDE or OUTSIDE option, lasso with both POLYGON and FREEHAND options in the SAME god damn TOOL, etc…). But it’s useless for drawing. Have you noticed the tablet support? The way the size vary as the pen pressure changes? Or have you tried to draw some details or to write something small (let’s say with letters of 10 pixels in height)? It’s a PAIN. Hopefully they’ll integrate the Painter nib engine in Photoshop X15…
SORRY! I meant “PHOTOPAINT X15″… 🙁
I can honestly say I couldn’t disagree more with you on this one, I have always found Photopaint easier to draw with than Photoshop and always looked at Photoshop as photo editing software. Maybe I should start doing some drawing tutorials? I’d need a new tablet though, I got rid of mine a couple of years ago… tablet works great though. And I’ve worked in tiny pixel sizes and never had any issues? Photoshop’s font control is better though, but I’ve never really had any issues that I couldn’t fix.
When you’ll get the Wacom you’ll know what I mean… 🙂 The PP drawing tools have an annoying ‘damping’ effect. As I said, just zoom in and try to write small letters for example (20-30 pixels in height).
And it’s not about spacing, I’ve tried every setting from 1 to 30, the same damn delay. Otherwise of course, PP is better in almost every aspect than PS (at least in my opinion).
* and no, I BET you don’t need any draing tutorials. 😛
Well that’s what I mean… I HAD a Wacom and I never noticed any issues in Photopaint. Maybe I’m used to it? Been drawing with it for over 10 years and I never use PS, so maybe I just don’t know any better 😉
Same thing with fonts… I write tiny text all the time for layouts and stuff. Or do you mean drawing letters with the tablet?
just a small example: let’s say you draw QUICKLY this blue line, about 10-15 pixels in height
http://www.aeroperfect.com/images/damping.gif
Photopaint will tend to have that dumping effect, showing you the orange line instead!
try it with the Art Brush, Transparency 0%, Spacing 5 (the rest – default settings)
With a tablet pen or with the mouse? LOL I have no idea what you are trying to show me now… You have me utterly baffled, sorry lol! The lines in your example are 1 or 2 pixels high. I dunno, maybe I don’t have enough coffee in me to knwo what’s going on?
Great work.
don’t worry man, it’s ok! my fault (it was about 4 am here…) That whole blue waved line should be 10-15 pixels in height.
But forget it 😛 After all, it’s not the tool that counts, but the man behind it
Haha you have me totally baffled now 🙁
i have a bigger(i think)problem
i have corel x4 and after a month all of my nibs are gone!
but i still have all the mini thumbnail but it doesnt change into that particular nib 🙁
any solution?
Hi Alec,
Do you have any idea what caused the nibs to vanish? Were you adding your own custom ones? Try downloading one of my nib packs and loading that in to X4 and see if your nibs start working properly. The other option is to reset X4 to all defaults and see if that fixes it. What you do is start Photopaint and hold F8 at the same time and keep holding it while the program loads. You will get a warning about Photopaint loading defaults and then it will be reset. Hopefully that resets the NIB configuration.
Good luck, let me know what happens!
Dan
wow!!!
you just saved me from suffering!!~!!
merry merry thank you so much T_T
have a nice day and holidays
godbless you
your student,
catholicskool_boy@yahoo.com
My pleasure, glad to help 🙂 Happy Holidays!
Terrific web-site, where exactly did you find the knowledge in this specific post? I am pleased I came across it however, ill be checking back soon to see what other articles you have.