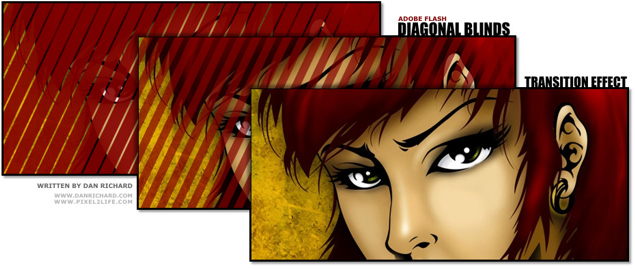
How to create a diagonal opening blinds transition effect for images in Flash
Introduction
Welcome to my first tutorial in quite awhile! Today I’m going to crack open something I haven’t used in a VERY long time, and that’s Flash. For those of you unfamiliar with my design background, I was a very heavy Flash designer and used to be quite specialized in ActionScript and coding massive desktop emulation style web layouts entirely in Flash. I’ve also put together many presentations and movies with Flash, and sometimes it’s fun to crack it open for a few minutes and mess around before I’m reminded how tedious working in Flash is and I close it for another year or two. In fact, when I stopped developing in Flash as a primary focus, it was back when Flash 5 was just being launched, so that gives you an idea of how long it’s been.
But with that said, it’s very much like riding a bike… you still remember how to do it even if you haven’t touched it for years. I have to admit the advanced ActionScript I once lived and breathed like a religion has complete slipped my memory beyond the Geturl and Stop commands, so luckily today I am going with a strictly animation style tutorial.
The first thing I want to mention is that my programmers love to giggle at my complete ignorance when it comes to PHP and other joys of website coding, and I’m fairly sure they do it on purpose to give me cryptic and code filled answers when I ask why something is broken and see if I pretend to understand. They might as well be clicking it out in Dolphin speak, as I’d have equal chances of understanding anyhow. So you can imagine the satisfaction when one of my friendly programmers asked if I still did Flash and if I knew how to re-create an effect he had seen on another website. It was a fairly simple transition effect and I knew instantly how to go about it. which I started hammering out in MSN. This was met with a confused mutter by the programmer who was clearly getting a taste of his own medicine. So without much nose rubbing, I quickly made him an example and thought I’d share this with everyone in the form of a tutorial.
What we are going to do is create an animated transition effect where it looks like a diagonal row of blinds is opening to reveal an image below. This can be used when loading a site banner, for buttons or as a photo gallery transition effect. Granted I’m going to be a tad sloppy about this, but you can create some very clean versions of this by using more masks to control the overflowing lines and such. I’ll also show you a couple of variants on this effect by adding a fade out as the blinds open.
Tools
For this tutorial, I will be using Adobe Flash CS3, but this technique can be used in any version of Flash, it’s all the same.
I would also like to give a shout-out to my friends at GoMedia.com, which is where I got the wallpaper I am using for this tutorial. Check out their stuff, they’ve got some WICKED artwork in their portfolio and some gorgeous Vector Packs, Texture Packs and more you can purchase, as well as some free goodies.
We’ll also have some project files for this tutorial, which are demo packs that include the .FLA, .SWF, and .HTML files needed to view each step. To use these packs, simply unzip the contents to a temp folder and you can either open the HTML file or the SWF file directly. Here are the files, which I will repeat when they become relevant to the tutorial:
File Download: Project Files 1
File Download: Project Files 2
Experience Required:
Since this is my first Flash tutorial, I’m going to make it very basic and assume you can barely navigate Flash. Each step and each click will be documented, but any future tutorials will assume you know how to perform simple tasks like creating new layers, converting items, working with frame functions etc.
All set? Just strike a pose, there’s nothing to it, VOGUE!
Part 1 – Setting the Stage
The first part of this tutorial will be to lay down the ground-work needed to create this effect. I’d also like to mention that we are going to use a pure animation based method of creating this effect and we’ll be manually duplicating movie clips for a tiling effect. As you advance your skills (or perhaps you already know how), you can achieve this via ActionScript, rather than manually tiling things out. You’ll see what I mean later on…
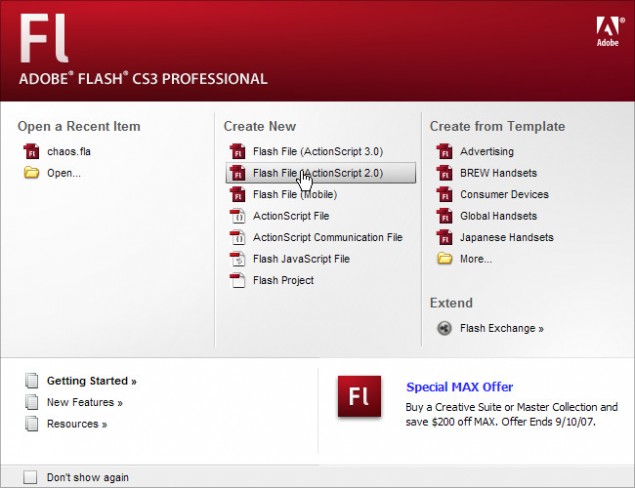
Step 1: First thing we need to do is create a new document. So pop open Adobe Flash CS3 or whatever version you work in and create a new blank FLA document:
Step 2: Next I’ll adjust the document settings to a smaller size that will make it easier to screenshot and I’ll adjust the FPS settings from the default 12 to 20. By doing this, the animation will be smoother and it won’t really increase the file size THAT much. If you’re looking to save space though, keep the rate low, but remember that the lower you set the FPS to, the more choppy your animations could appear.
Step 3: Now we’ll add a background image to our main stage. I didn’t even bother doing an import, I just pasted a section of my XP wallpaper directly in to Flash. It’s a bit bigger than my specified stage size, but that doesn’t matter as the excess won’t show on the final product. While we’re at it, let’s name our current layer ‘Background’ to keep things organized. You should try and make it a habit to properly label your layers as you work. Right now you might know where everything is, but try opening a complex FLA file a year later and it’s time for Aspirin!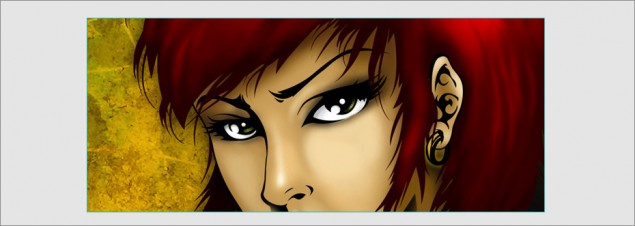
This layer is now done, so let’s go ahead and lock it before we move on to the next step:

Step 4: Next up, we’ll create a second layer above our Background layer, and we’ll name it ‘bars’. This is the layer that will hold the diagonal bars that create the opening blind effect.
Ok, we’re done this part of the tutorial, our scene is ready for the next step, which is to create the animated bar that will produce the blind effect. Please click on Page 2 below to continue!
Part 2 – Creating the Bar
Hanging in there? I hope, we’ve only just begun the fun stuff! In this part of our esteemed tutorial, we’ll create the bar that will later be animated and duplicated to create the opening blinds effect. For now we’ll start with drawing in the bar and creating the mask layer.
Step 5: Go ahead and click on the first frame of the ‘bars’ layer to ensure that any objects we import or draw at this point will be dropped in the proper frame.
Step 6: Time to draw our rectangular bar… go ahead and select the Rectangle Tool, which we’ll use to create our bar:
Now click on the fill color and let’s pick out a nice color for our blind:
I decided to go with some nice deep red, which I sampled from her hair:
Then disable the line color:
And finally, draw your rectangle!
Step 7: Once we have our rectangle drawn out, we’re going to need to change the angle of it. Actually, check that… we don’t NEED to, but I wanted to get a diagonal effect. You can actually do this exact effect with vertical or horizontal bars if you want, it’s entirely up to you. BUT before we get to editing, let’s convert our rectangle in to a movie clip first, then any edits we perform will be directly to the movie clip. You do this by selecting the object tool and clicking on the rectangle we created:
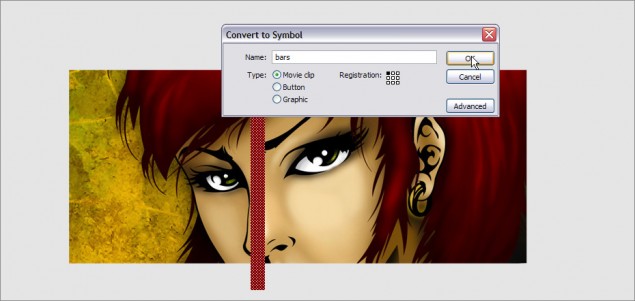
Hit F8 and that will load the Convert to Symbol dialog box. Select Movie clip and hit OK:
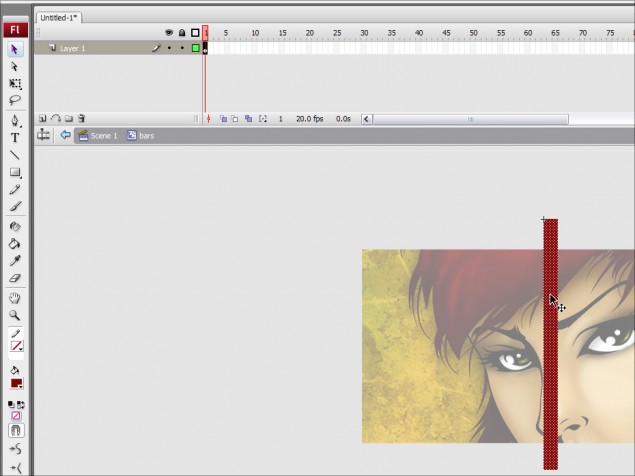
Now to edit the movie clip, simply double-click on it and we’ll move to the movie clip timeline. You can see there is a breadcrumb navigation just under the layers docker that shows we are editing a movie clip located on the main scene:
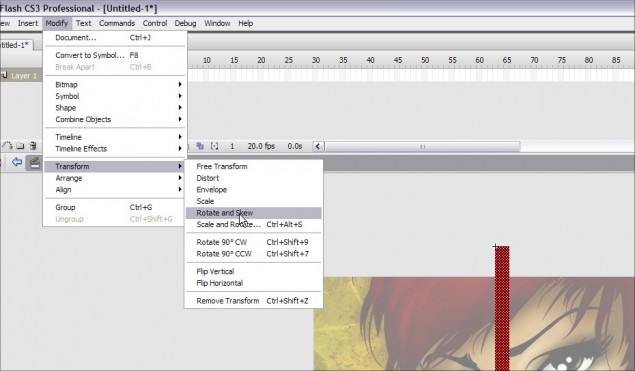
Now go ahead and click on Modify > Transform > Rotate and Skew and you will see the rotate points show up on your bar:
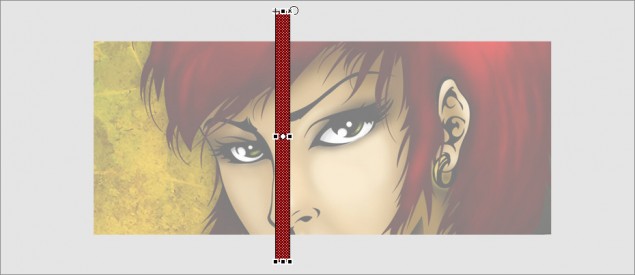
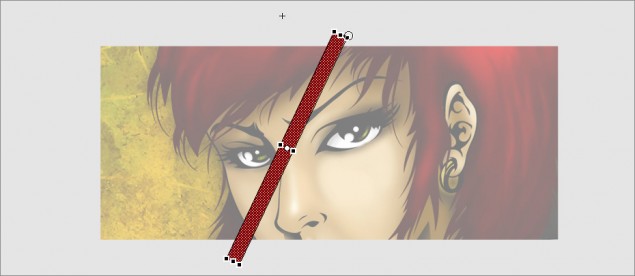
Grab a corner and simply move your mouse to the right or left to rotate the bar. Once you get the angle you want, release the mouse button and you’re done! Here’s what I went with:
Step 8: Before we can animate anything, we need to create our mask layer! So go ahead and click on the new layer icon:
Now here’s where it gets a bit tricky, so follow this carefully. Click on the first frame of the first layer and your red bar will be selected. Hit Ctrl-C to copy the bar to clipboard (Or hit Edit > Copy) and then click on the first frame of the SECOND layer and hit Ctrl-V to paste a copy in to your movie clip (Or hit Edit > Paste). You now have 1 red bar on each layer in your movie clip!
Clicking on the first frame of the first layer:
Then pasting a copy of the bar on the first frame of the second layer:
We now have the pieces ready to create the mask layer!
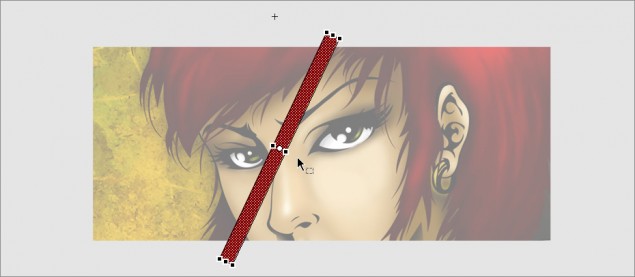
Step 9: Ok, next up you need to use the arrow keys on your keyboard and slowly move the red bar on the second layer so that it is placed exactly over top of the red bar on the first layer. Just tap the keys until you get them aligned as best as you can. Once the bar is moved in to position, it will now look as though you’re back to one bar:
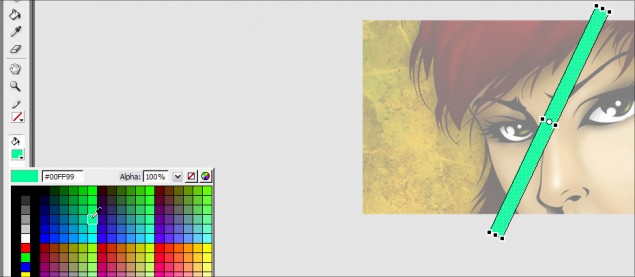
Step 10: To make things a bit easier to follow, we’re going to change the color of the bar on the second layer to green, just so it’s easier to distinguish the two from each other. This green bar will then become our mask object on the mask layer. Go ahead and choose a fill color (I went with bright green) and use the bucket tool to fill the bar with green:
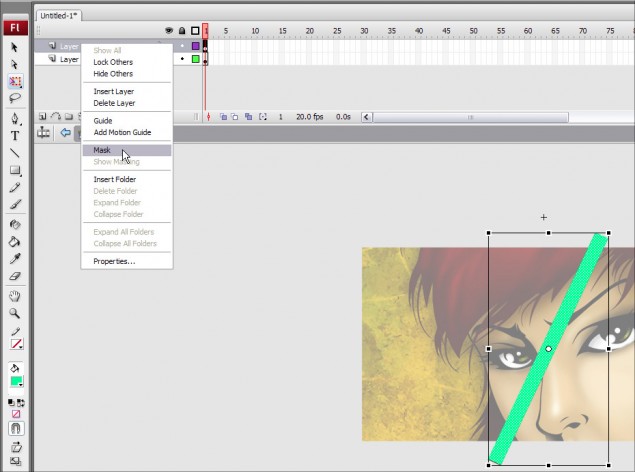
Step 11: Now go ahead and right-click on the second layer and click on Mask. This will change that layer in to a mask layer!
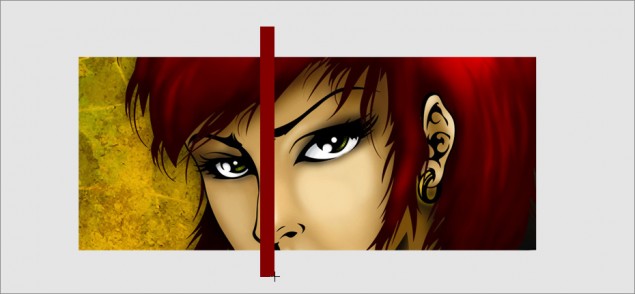
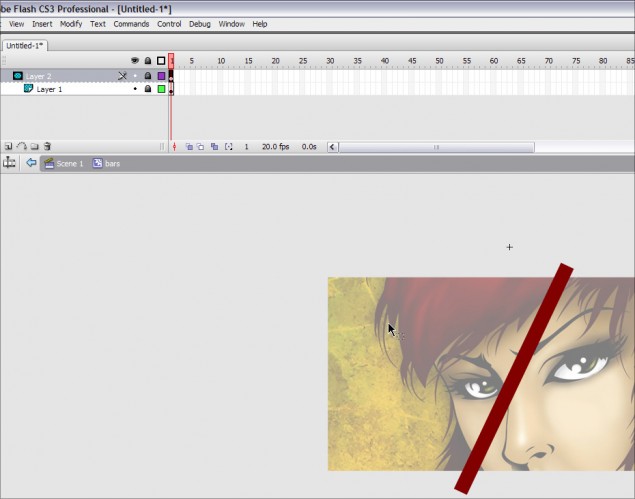
And this is how your stage will suddenly look:
QUICK TIP! What is a Mask Layer? As mask layer is a special layer containing objects that will create a display mask in the layer directly below it. This means that if you create a mask layer with a circle in it, the only time anything in the layer below will be displayed is if they show up within that circle. Anything outside of that circle, which is a mask object, will not show up.
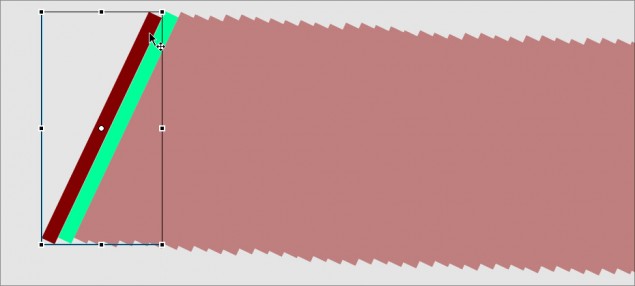
So now our green bar has become invisible… this is because the mask layer has been applied, and unless you unlock the layer, it will remain invisible as it’s not necessary to see on the stage unless we need to work on it directly. The red bar you are seeing in the last screenshot is the bar located on the first layer. The only reason you can see it is because it’s aligned perfectly with the green bar mask in the second layer. If that red bar wouldn’t have been aligned when we created the mask layer, it would be completely invisible right now.
Make sense? I hope so because it’s time to go to the next page and animate the bar!
Part 3 – Animating the Bar!
With our bar and mask layer done, we can move on to animating the bar to create the opening effect…
Step 12: Our first step is to extend the amount of frames that our mask layer uses. We want the animation to be fairly quick, so we’ll go with 15 frames, which means the animation will take 3/4 of a second to play. Start off by making the second layer invisible, and unlocking the first layer by clicking on the lock icon. Once you have that done, click on the first frame of the second layer and hit F5 to insert 14 additional frames for a total of 15.
Making the second layer invisible and unlocking the first layer:
Inserting the additional frames:
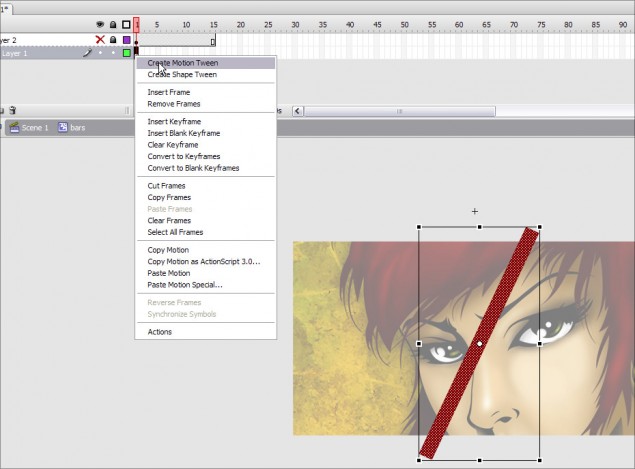
Now right-click on the first frame of the first layer and click on Create Motion Tween to create the tween:
Our motion tween is now ready for the animation process!
Step 13: The next step is to add some additional frames to our motion tween and then move the bar in place on the final frame the create the motion. Start off by clicking on the first frame of the first layer and hitting F5 until you have 15 total frames:
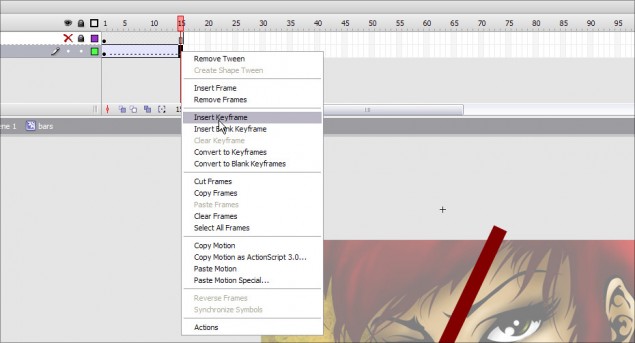
Then you right-click on the last frame and click on Insert Keyframe. Now any changes we do to the objects on the first layer will automatically tween from their positions on the first frame. As an example, if we have a square on the first frame towards the left and on the last frame we move that square to the right, the motion tween will automatically animate the square moving from left to right. In our case, we want to animate the bar moving.
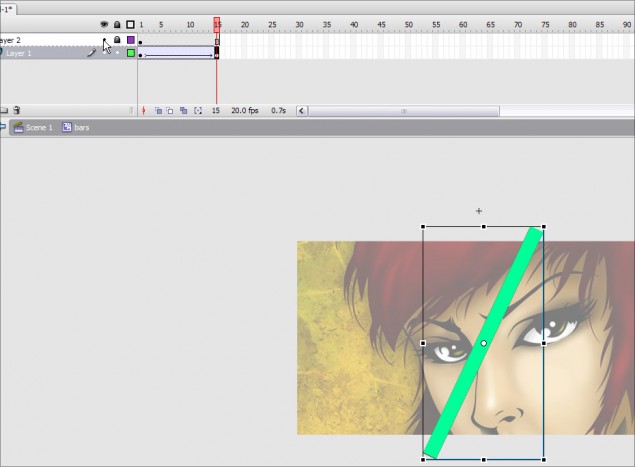
Now go ahead and make the second layer visible again by clicking on the red X, and poof! The green bar is back on top of the red bar!
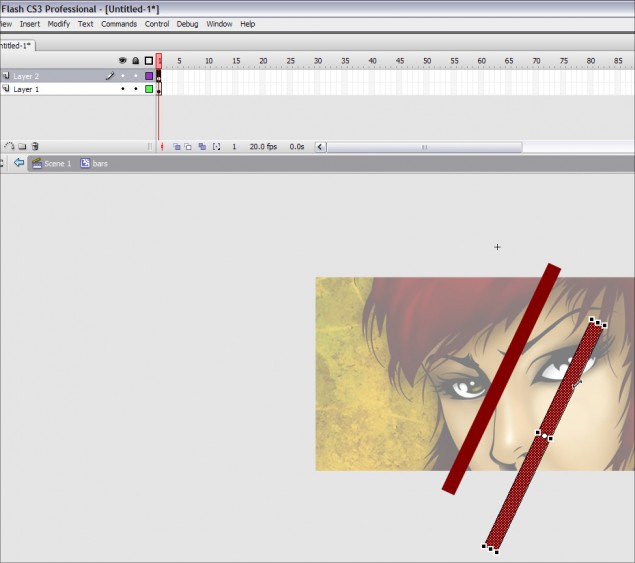
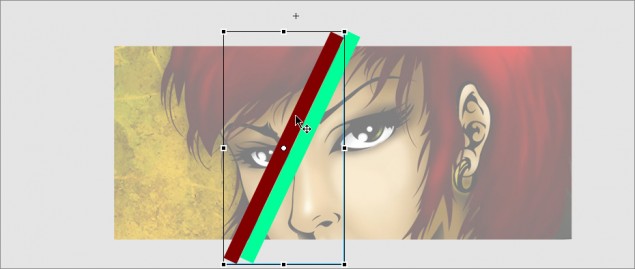
Click on the last frame of the first layer and using the left arrow key on your mouse key, move the red bar to the left until the right edge is touching the left edge of the green bar:
And you’re done! How’s that for simple animation? Now lock both layers again and you can test out your handy work… just click on the #1 above the second layer and hold the mouse button down and drag your mouse to the right. You can see your bar will disappear to the left as it moves off the mask layer object. Cool eh?
Once you’re done, click on Scene 1 on the breadcrumb navigation under the layers docker to return to the main stage and we can cover our banner with the bars and create our opening blinds!
Next up is Part 4, so please click on the next page below to continue!
Part 4 – Creating the Blinds!
Now that you’re back on the main stage, you can see we’ve only got one bar, but we need the entire banner covered in them, so we’ll need to duplicate this bar multiple times until we have complete coverage. Now you could also do this dynamically with ActionScript, but to keep it simple, we’ll go with good ol’ Copy/Paste.
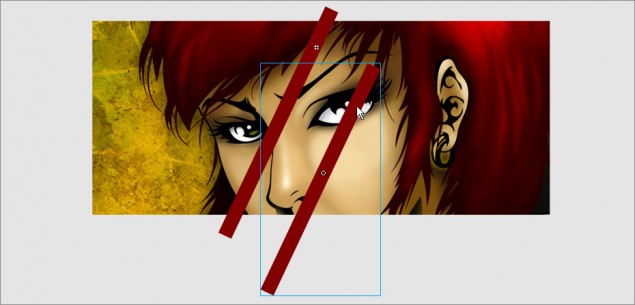
Step 14: Click on the red bar movie clip and copy/paste a new copy (Hit Ctrl-C and then Ctrl-V). You now have a second copy of the movie clip on your stage:
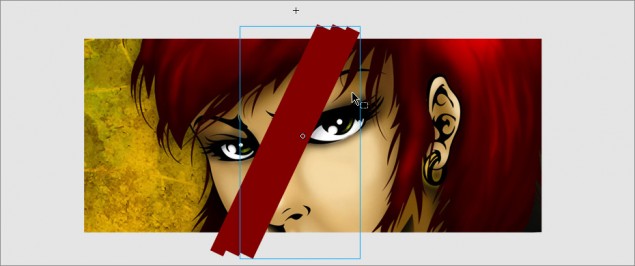
Simply grab the bar and move it right next to the first one so they line up side by side… do this a few times so you have 3 or 4 bars tiled along side of each other:
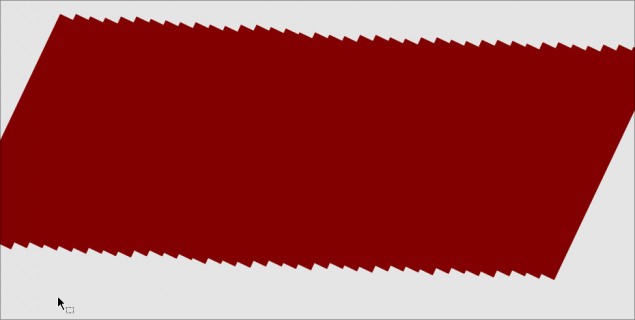
Once you have a few bars together, grab all 3 or 4 bars and do another copy/paste and then tile those larger groupings. It’s a heck of a lot faster than doing one at a time! Cover your entire banner and you’ll end up with something like this:
Now that we have our banner covered with our bars, we have one little thing we need to take care of first… because we didn’t add any kind stop actions, our blind animation will continuously loop over and over again. We only want it to play once, so we’ll need to fix that up before we can export our movie.
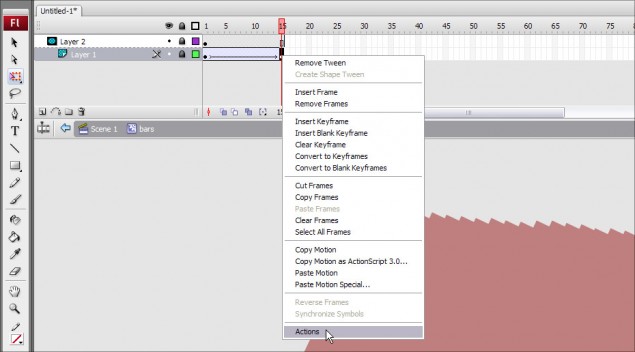
Step 15: Double click on any of the red bars you created on the main scene and that will let us edit the movie clip. Now right-click on the last frame of the first layer and click on Actions:
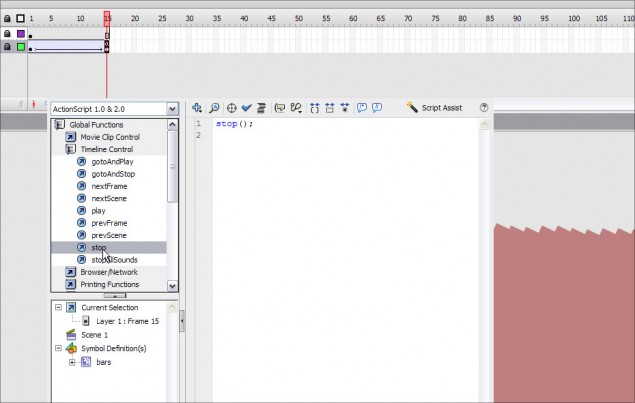
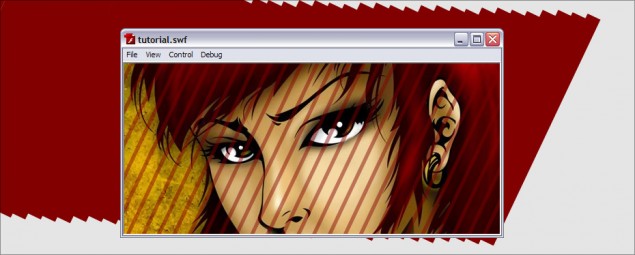
This will open the Actions menu, allowing us to choose any Actionscript actions we need to control the movie. In this case all we need is a stop command, so click on Global Functions > Timeline Control > Stop. You will then see stop(); show up on the right, meaning that action has been added to this frame. Close the Action docker and hit Ctrl-Enter to preview the export. You should now have your blinds animation effect!
Here is the project file, which contains the SWF and FLA files for this tutorial up to this point:
File Download: Project Files 1
Now you can stop here, or you can continue to add a little tweak to our blinds! In the current animation, the red bar remains a solid color as it moves off the mask layer object and disappears. In this extra little bit, I’m going to show you how you can add a fade effect to give some extra visual impact to the animation.
Step 16: At this point, you should still be in the movie clip edit mode… go ahead and click on the last frame of the first layer and then unlock both layers by clicking the lock icons:
Now click on the red bar:
When you clicked on the red bar, the properties box at the bottom of the screen (or wherever you’ve placed you properties docker) will now display the settings for that red bar. Click on the Color dropdown and select Alpha… Alpha is what controls the transparency of the object, so 100% alpha is completely solid, 0% means the object is completely transparent.
Use the level adjuster to set the alpha to around 25% or lower… in fact, you can go right down to zero if you want.
Now go ahead and lock the two layers again and click back to the main scene:
ALL DONE! Time to do the happy dance!
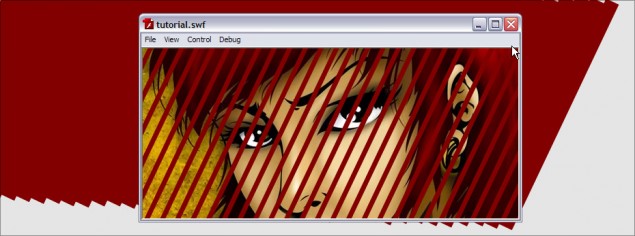
Step 17: Hit Ctrl-Enter to preview your movie export:
You can download this project file, complete with the FLA and SWF at:
File Download: Project Files 2
That’s it for my first Flash tutorial! I hope you enjoyed this lesson and I look forward to teaching you more goodies in the near future. Please make sure you share and comment on this tutorial using the features below if you enjoyed this.
Dan















7 thoughts on “How to create a diagonal opening blinds transition effect for images in Flash”
Now this picture totally hit the chart of my top lists!!!!!!!!!!!!!!!!
hope that you’ll continue it.
This is very cute picture and your blog is also fantastic. I am very happy to see your blog.
Excellent tutorial!!!! 😀
I’m now thinking about AE and Fl.. Which one is best for me… I just inspired by your tutorials..
That’s a great creative tutorial. Special thanks for giving us an opportunity to work with the attached projects (Most of the time authors doesn’t provide the project)
This blog is very helpful for any graphic designer. I needed some clipping path related article. Can you post clipping path related article next time..
i just added your site to my favorites. I really enjoy reading your posts.Thanks for your great post.Looking forward to read your next post.