Importing Brushes – How to import Photoshop ABR brushes in to Corel Photopaint!
Introduction
Welcome to another Photopaint tutorial, and this time I think you Corel folks are going to LOVE what we’re going to do here. I’m sure if you surf graphic sites and such, you always see people using these awesome brush packs for Photoshop, but if you use Photopaint, you’re SOL. So you go on Google and search your heart out for ways to import these .abr brushes into Photopaint, but all you find are forum threads about people asking this very same question with either no response, or someone said “Sorry, you can’t, change to Photoshop”. Well my friend, guess what? NONSENSE I SAY! Of course you can do it, so today I am going to show you how to convert and import .abr Photoshop brushes right onto Photopaint and use them as Photoshop nibs (what Photoshop folks call brushes are referred to as nibs in Photopaint).
Oh, and fun doesn’t stop there folks! Not only will you FINALLY be able to use .abr brush packs in Photopaint, but you DON’T need Photoshop to do this and it won’t cost a cent for the third party application we’ll need to perform this wondrous task.
Have a I mentioned how excited I am bringing this to you guys?
Actually, I was a sweet tutorial a few days ago that was a photo manipulation project, and it uses this beautiful set of fairy wing brushes from DeviantArt. I downloaded the .abr file and of course they were all but useless. I knew there was a way to use the brushes, but I just couldn’t remember, and there was literally ZERO support online on how to figure it out. So I altered my search and started looking for converters that could convert .abr brushes to .png files. That’s how I found an application called ABRviewer, and it did exactly what I needed.
So here it is gang! Read on and learn how to get those .abr brush sets working their magic in Photopaint.
Setting Up
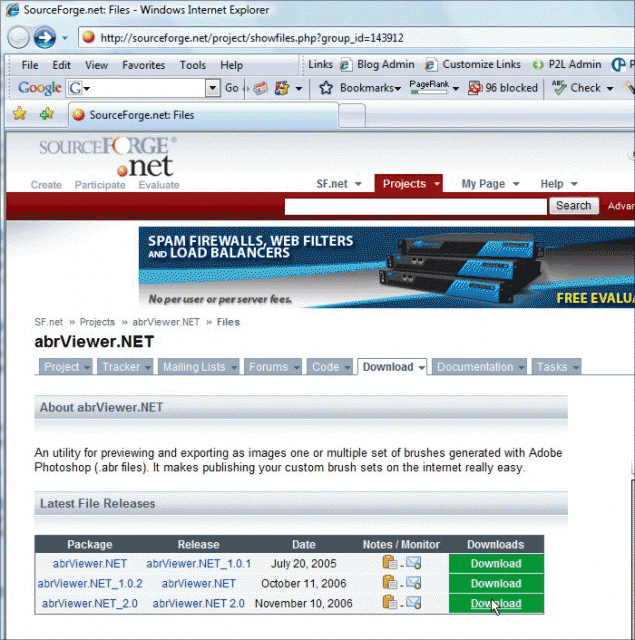
Step 1: The first step is to download the latest version of ABRviewer. This is a completely free, open source application you can download from Source Forge. If for some reason SF is down or they stop serving this application, I have attached the 2.0 version to the tutorial, which you can download HERE!
So go directly to http://sourceforge.net/project/showfiles.php?group_id=143912 and click on the green Download link for the version you want (I recommend you grab the latest):
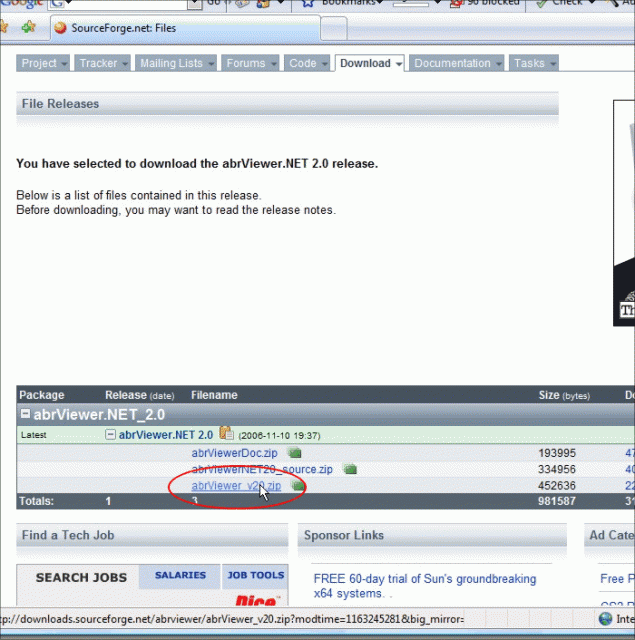
On the following screen, click on the filename you want to download (On this screen shot, the first file is the documentation and the second file is the source code. We want the third, which is the distribution set used to install the application):
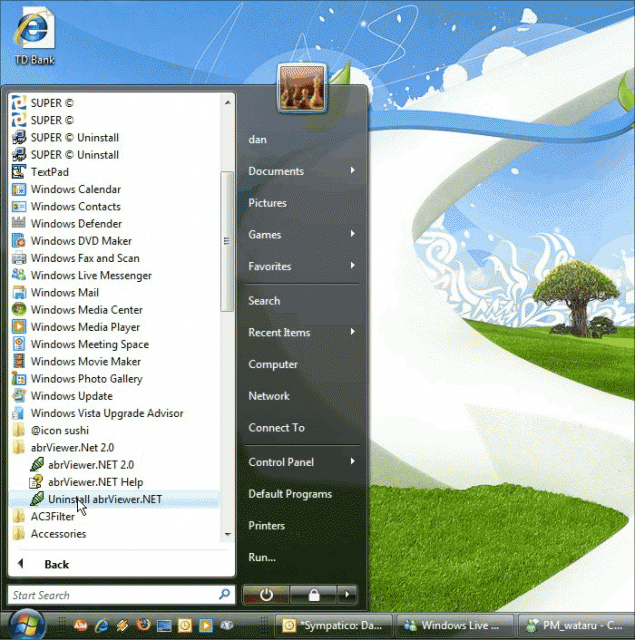
Step 2: Once the download is complete, unzip the archive to a temporary directory and run through the setup to install the application. Once installed, you’ll find the new application under Programs > abrViewer.NET 2.0 and click on abrViewer.NET 2.0 to launch the application:
Conversion Process
Step 2: Once the download is complete, unzip the archive to a temporary directory and run through the setup to install the application. Once installed, you’ll find the new application under Programs > abrViewer.NET 2.0 and click on abrViewer.NET 2.0 to launch the application:
Conversion Process
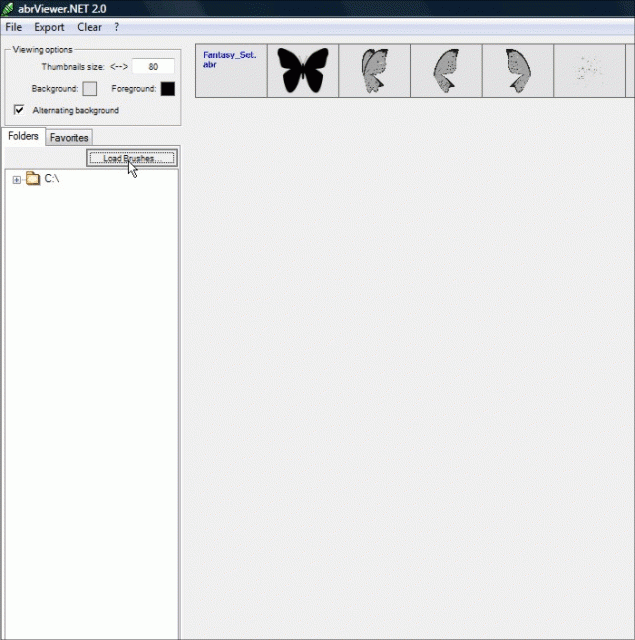
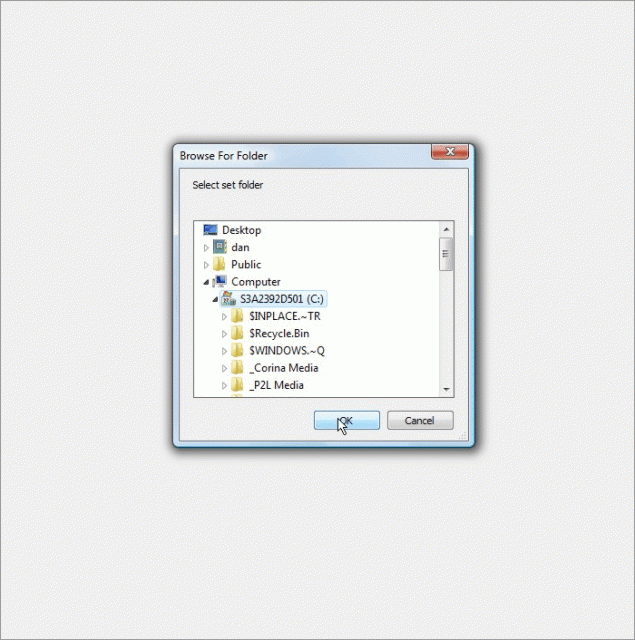
Step 3: Time to load the brushes we want and export them to .png files! With the application now open, click on the Load Brushes button and browse to the folder where the .abr file is located:
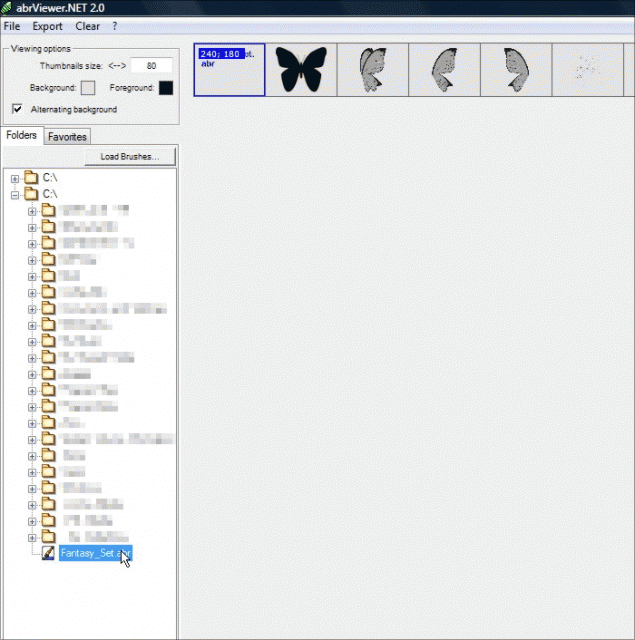
Simply double-click on the .abr file you want and it will show you a preview of the brushes contained in the pack:
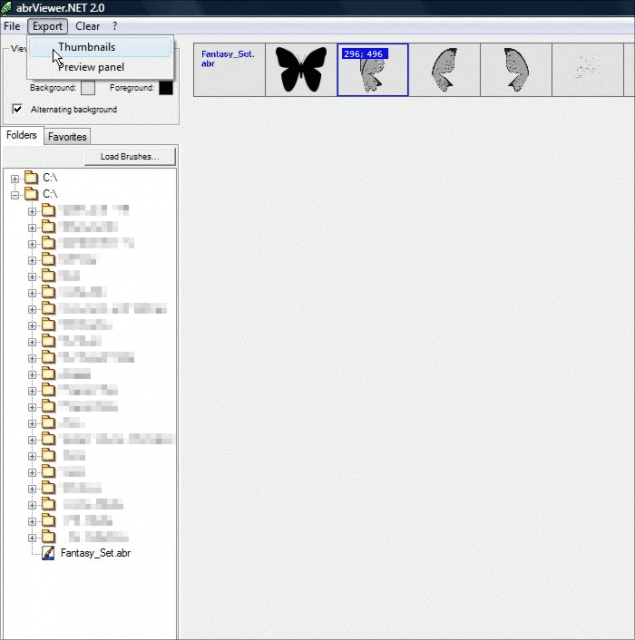
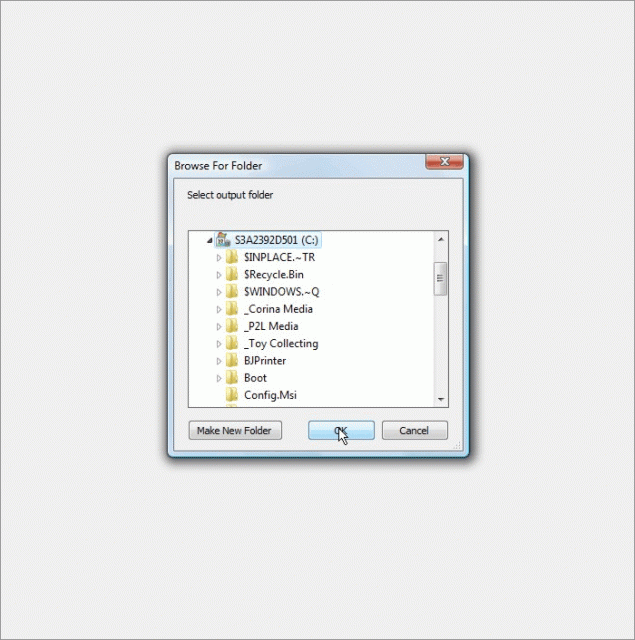
Now click on Export > Thumbnails and it will open a file browsing window. Browse to the folder you want to save the .png files in and click OK.
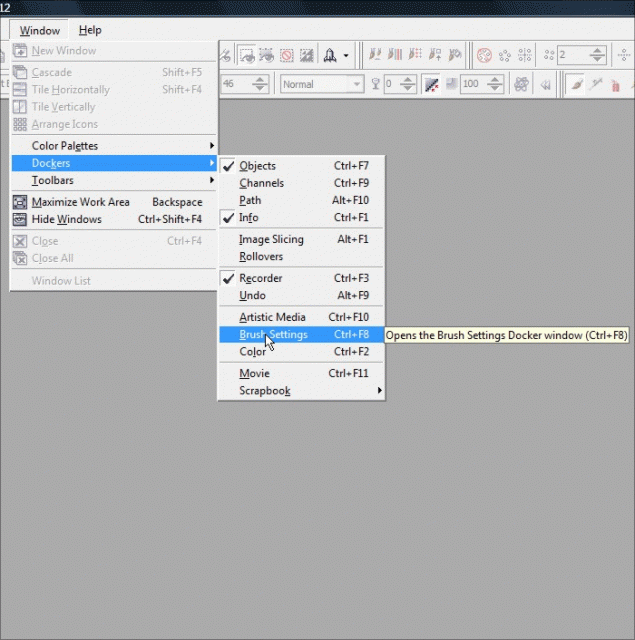
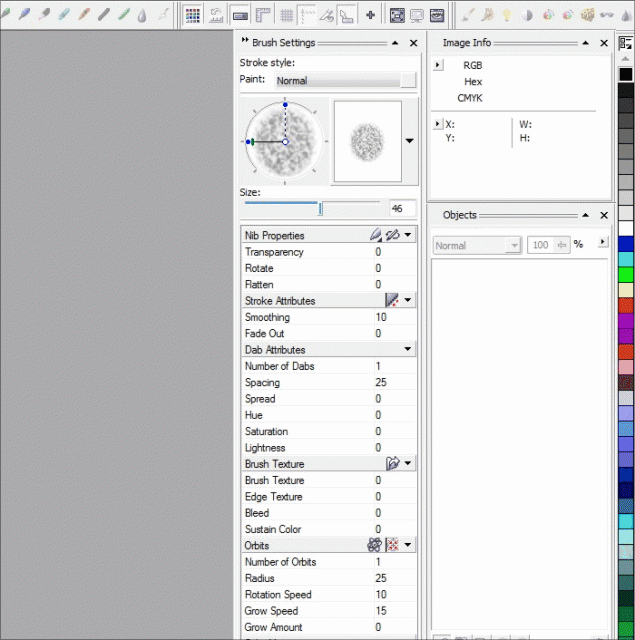
This is what the docker looks like when it’s in use (If you don’t have a document open and you’re not using the brush tool, the docker will just be blank):
Importing the Brush
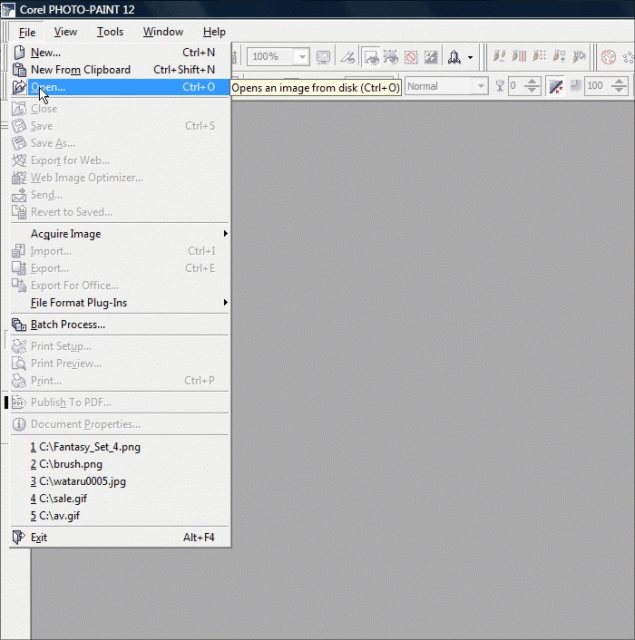
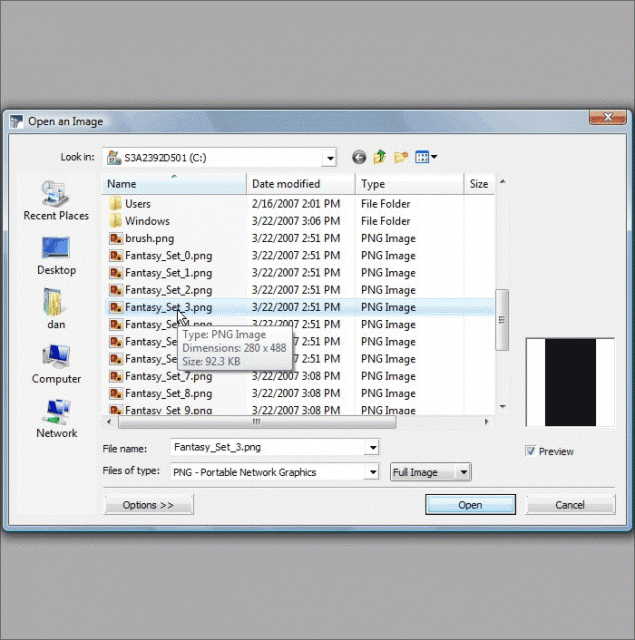
Step 5: We can now create the brush nib. Open the .png file for the brush you want to create:
Note that the preview may be blank or a solid black square. That’s normal, it’s just too small to show you the masks contained within the .png file.
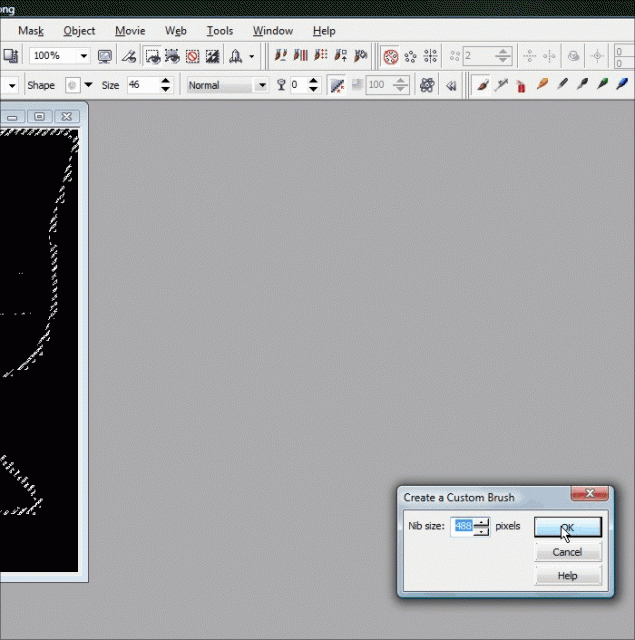
Click OK and it will open the .png file with the masks intact outlining the entire brush:
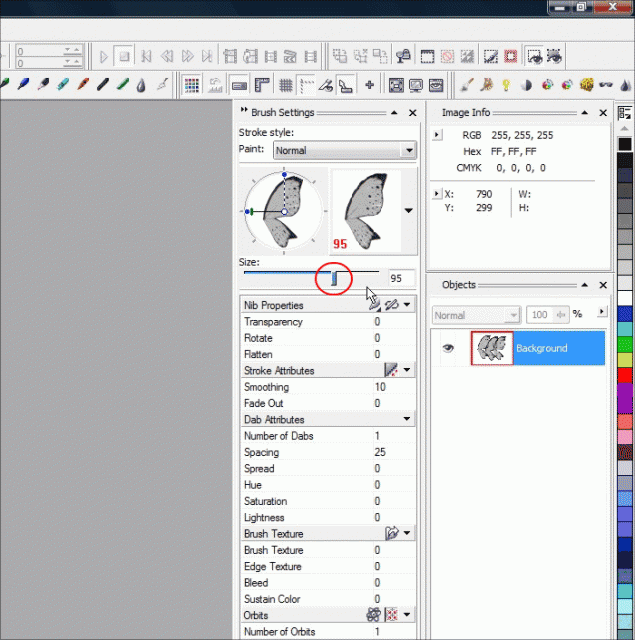
You will be prompted for a default brush size… you can either set one or use the preset default:
The Photoshop brush is now your new nib! Congrats!
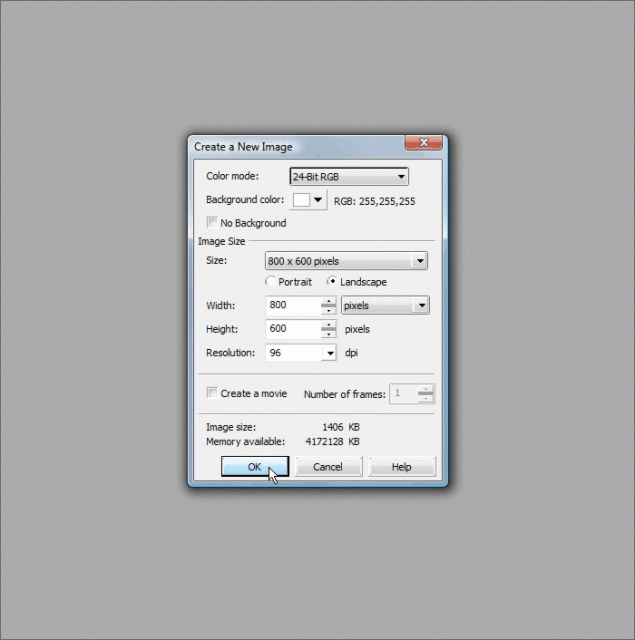
Step 6: Shall we play with our new brush? Yay! Happy times! Create a new document with whatever settings float your boat and start BRUSHING!
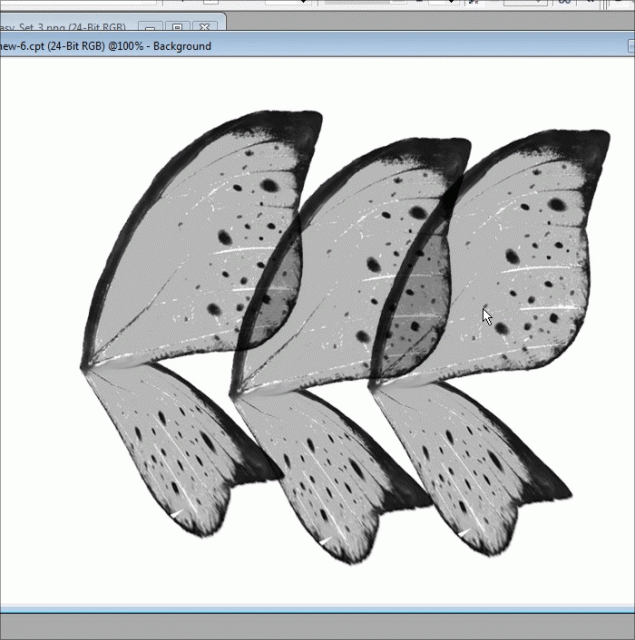
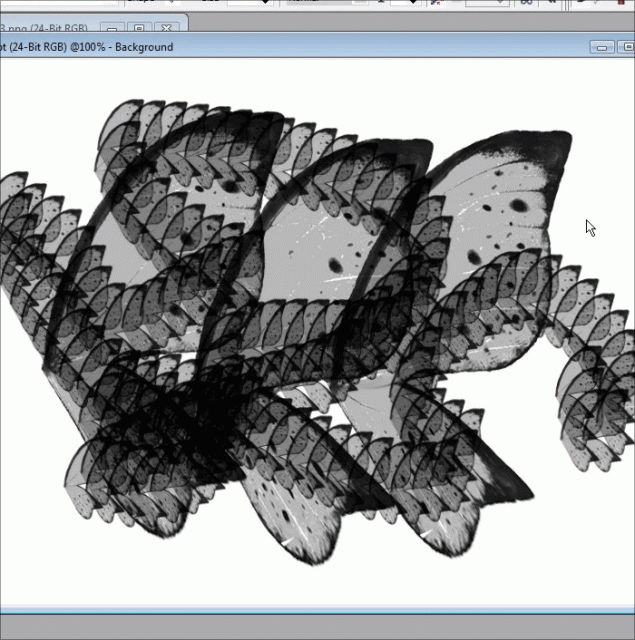
Just click on the workspace and your brush pattern will be applied, of you can hold the mouse button down and paint solid lines of the nib pattern:
You can also reduce or expand the size of the nib and change the angles, opacity etc:
Smaller brush size:
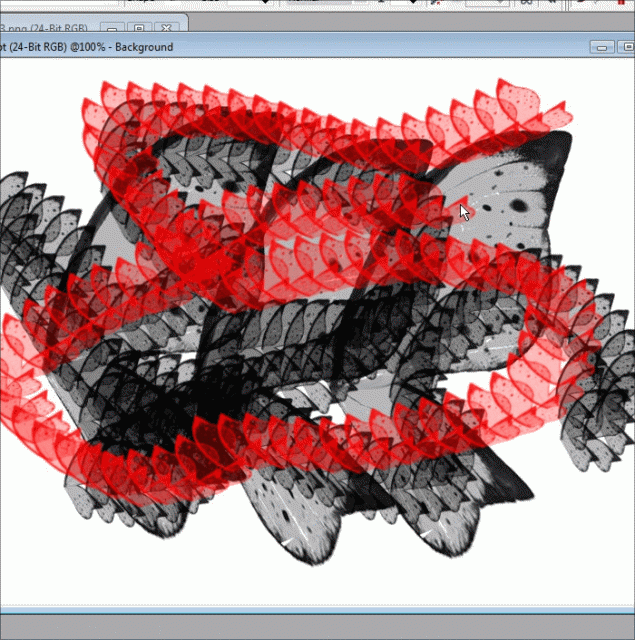
Using colors:
Conclusion
So remember, the next time you see a poor soul drooling at the never ending line-up of Photoshop filters that he *thinks* he can’t use in Photopaint, save his life and show him this tutorial!
I hope you enjoyed this tutorial and you are now happily using .abr brushes in your Corel products. Thanks again for reading and we’ll see you next time!
Dan

16 thoughts on “Importing Brushes – How to import Photoshop ABR brushes in to Corel Photopaint!”
Great!!!
but I’m not using Photopaint anymore 🙁
how do i use these brushes in corel draw
i can use them in photo paint how do i use it in coreldraw
Thanks Dan, this is a very usefull tutorial, I love the extra nib brushes included on CorelDRAW Suite CD, but sometimes I find brushes for Adobe Photoshop that I would like to use with my dear Corel Photopaint, so this tutorial is perfect ! Thanks for sharing.
I am going to add a link in http://corelforum.corelclub.org ( in Spanish ).
Kind and corelian regards from Spain!
Your link to the ABR Viewer download is broken. Do you have a current link?
Et sinon comment ça se passe pour ceux qui veulent des brushes de corel painter sur photoshop?
There are some steps left out in the tutorial. Also, how do I now use these in CorelDRAW?
Awsom I’m going to test that
This tutorial seems like it’s missing steps. I have done each and every step as listed, and I am NEVER prompted for setting a default nib size, there is absolutely no way that I can find anywhere in ANY of the menus or on the nib settings dockers to even save a custom nib preset. This tutorial looked great, but upon actually trying to do it.. and following it every step of the way – it is NOT helping, and is NOT doing the job. I get nowhere with it.
It seems like it’s completely missing steps. Open the .png file in Photopaint… then what??? I open the .png from the extracted ABR, and I just have a png file sitting in Photopaint like any other image I might be editing. Even with the nib tool selected before opening it, even with the nib settings docker open. No prompts, and NO way to save that png as a nib setting in Photopaint that I can find.
“Click OK and it will open the .png file with the masks intact outlining the entire brush:
You will be prompted for a default brush size… you can either set one or use the preset default:”
In between the above two sentances on your tutorial, there is absolutely no text, no reference images, nothing. What the heck am I supposed to do in between opening a .png image, and somehow, magically, getting the brush settings to let me save that png as a nib????? You need to be clearer on your instructions. I feel like this is missing entire steps, and as a result, I can NOT duplicate what the tutorial is supposed to be teaching. It is an exersize in futility for me. I am still sitting here staring at the extracted ABR thumbnails with absolutely NO way to save them in Photopaint as a nib, just like I was at the beginning of the tutorial.
I am using Photopaint x7. Maybe this does not work in my version of Photopaint?
Hey Skeller – I have a feeling that’s exactly the issue, I did this tutorial with x3 I believe so it’s very likely the steps are not valid for x7 as they’ve changed something. I currently use x5 and these steps still work 100%. Sorry you are having problems. Should I ever update to x7, I’ll try to update my tutorial.
Dan
Hello,
Thanks for the response. I’ve been all over the net at this point, hunting for a way to convert the brushes. I used Photopaint 8 right up until this year, when I was forced to buy a new machine, and got stuck with Windows 8.1 (And Photopaint 8 is just too old to work under that OS). In version 8, I could convert them over easily, even without the ABR extractor.
I just haven’t been able to figure out how to do it with the current (x7) version. Even on the Corel forums, people say it’s possible, but even following their steps, it just doesn’t work. The closest I can get is having the transparency of the png mask to be used in the current brush… yet still no way to save a custom nib from it. I can’t imagine that they would have completely removed the ability to save custom nibs from x7, but maybe they did… I don’t know. LOL
If I can figure it out myself, I’ll post it up here as well. =) I doubt I’m the only one with x7 trying to do this. 😀
Thanks again for your response.
~S. Keller
Ok I think I found the way to do that in X7. After you opened the brush settings and your .png file in photopaint select the object (the brush you opened) go to object manager right click on the object>mask from object.
Open again the brush settings: on the first bar “nib properties” you find three icons…click the first one “nibs option” and then “Cterate from Contents of mask”. The little window with the brush size option will appear on the working window so you can set the brush default dimension. Then return on “nibs option”>nib save as…your brush is saved.
Attention: be sure the paint tool is on when doing the process.
It’s a bit complicated but not impossible.
Yes, It worked.
Yes! That works perfectly. Thank you very much!
Thank you for the conversion tutorial. How would I bring the PP brushes into CorelDraw x6 so I can use them in projects? Is it even possible?