Digital Photography Tutorial: Aperture Tricks and Tips for Close-Up Object Photography
As a product photographer enthusiast, I deal a lot with close up shots and macro style photography that can range from photographing 2 foot model kits, to the model numbers on the bottom of a Hot-wheels car! I shoot with relatively cheap equipment that I am slowly upgrading to a professional level, but whether you spend $200 or $20,000, the basic principals of photography still apply. In fact, it doesn’t even matter if you shoot film or digital, because the rules of aperture and other camera basics are universal. Before we begin, let’s put some of the fancy photography terms that you might have heard to plain English shall we?

ISO and ISO Speed:
ISO stands for International Standards Organization, and the ISO rating of your film is the ISO speed rating established by this organization. According to Kodak, this is the official definition: The emulsion speed (sensitivity) of the film as determined by the standards of the International Standards Organization. In these standards, both arithmetic (ASA) and logarithmic (DIN) speed values are expressed in a single ISO term. For example, a film with a speed of ISO 100/21° would have a speed of ASA 100 or 21 DIN.
So what does that mean? The higher the number, more sensitive to light the film is and, the faster you can shoot at. Why is this important? The less sensitive your film is, the more exposure your film needs to take the shot. This means you have to slow down your shutter, and the more you slow down the shutter, the more likely your photos will be blurry if you’re shooting action. The other side of the scale is that the more sensitive your film is, the more noise it picks up… noise appears as tiny spots all over your photo that become quite evident if you blow up your shots significantly.
What are the guidelines? When you’re outside on a nice sunny day, shoot ISO 200. Cloudy days and bright indoor locations should use ISO 400, and darker locations should go with an ISO 800 film or faster, depending on what you’re dealing with.
Shutter:
The shutter is normally a set of blades, a curtain, plate, or some other movable cover in a camera that controls the time during which light reaches the film. The longer you set the shutter speed, the longer your film is exposed to light and the brighter your photo becomes.
Aperture:
Aperture is the opening in a camera lens through which light passes to expose the film. The size of aperture is either fixed or adjustable. Aperture size is usually calibrated in f-numbers. The larger the number, the smaller the lens opening.
Now here is where things become important when it comes to close-up photography… by combining various configurations of shutter speed and aperture size, you GREATLY affect your depth of field. This means you can alter what’s in focus, and what isn’t and that is the main focus of this tutorial.
F-Stop or F-Number:
A number that indicates the size of the lens opening on an adjustable camera. The common f-numbers are f/1.4, f/2, f/2.8, f/4, f/5.6, f/8, f/11, f/16, and f/22. The larger the f-number, the smaller the lens opening. In this series, f/1.4 is the largest lens opening and f/22 is the smallest. Also called f-stops, they work in conjunction with shutter speeds to indicate exposure settings.
So when you hear a photographer say to his assistant that he’s going to open the lens right up, this means he’s going to increase the aperture size by setting the F-Number to a lower number. He might turn around and say close up the shot, in which case he’s saying he wants to close up the aperture setting by increasing the F-Number. Why would he want to do that? That’s what we’re going to find out next!
For a complete glossary of photography terms, check out Kodak.com
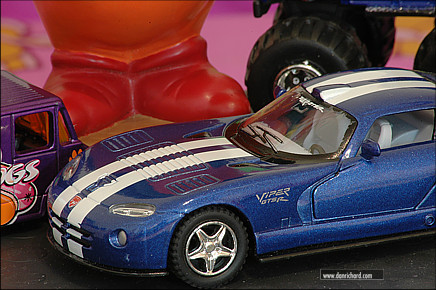
To begin, let’s look at some live samples that I took of some toys clustered together. The following shots were all taken with a tripod mounted Nikon D70s Digital SLR camera using a 70-300mm Sigma DL Macro Super lens in Macro mode with ambient light. No Flash was used. In fact, let’s just mention this right away… NEVER shoot product shots with a standard front mounted flash. This simply washes out the colors and looks terrible. Always shoot ambient light or with the proper flash lighting equipment.
Throughout these shots, the only thing that changes is the ISO speed rating of the film. I’ll start with a 200 ISO rating and work my way to 1600 so you can see how much the exposure changes shot to shot. I shot all the photos with the same shutter speed and aperture size, which was 10 seconds exposure at F/32.
ISO 200 Speed:
You can clearly see that this photo is too dark, otherwise known as under exposed. For this photo to have turned out correctly, the shutter speed would have to be slowed even further than the current 10 seconds.
ISO 400 Speed:
Exposure is just about right in this photo!
ISO 800 Speed:
A good portion of this photo is too bright, otherwise known as over-exposed. The shutter speed should be increased to lower the time that the film is exposed to light and that will darken the image.
ISO 1600 Speed:
Every highlight throughout the entire photo is over-exposed and glaring white. Once again, the shutter speed needs to be increased quite a bit to lower the exposure time of light.
ISO Noise:
Now, remember earlier I mentioned that as you increase your film’s ISO rating, the more noise your photograph will have? Well, in these photos, it’s impossible to really see the difference in noise, but here is a portion of that same ISO 1600 photo at 100% zoom:
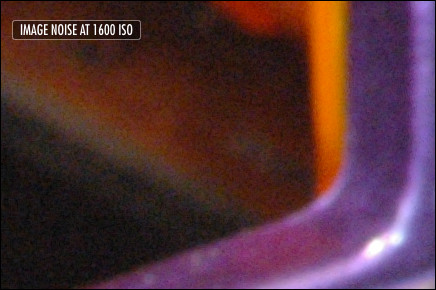
You can clearly see the noise throughout the area shown, and it only gets worse if you blow the photo up. High Speed film is great to work with, but starts getting ugly if you plan on making large prints.
Playing with shutter speeds and aperture:
When it comes to close up photography and depth of field, you have two extremes:
1. Primary area in focus, secondary areas blurry
2. Primary area in focus and moderate to minor clarity of secondary areas
This doesn’t just apply to close-up product shots either! You can see this in almost any kind of photography, and if I had to name an example of where you would see an example of these extremes, look at the sports pages of your newspaper. Check out the sports action shots where the photographer captures background elements and you’ll notice that some have very blurry backgrounds, yet others have fairly clear and crisp backgrounds. What causes this? It’s called depth of field, and you can control it by adjusting your aperture settings! The rule of thumb is quite simple… the larger the F-Stop number is, the more crisp the background becomes. If you want the primary object to be crisp, but have a fuzzy background, open the lens up completely with the lowest number F-Stop your lens supports.
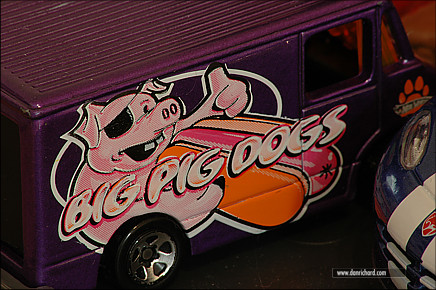
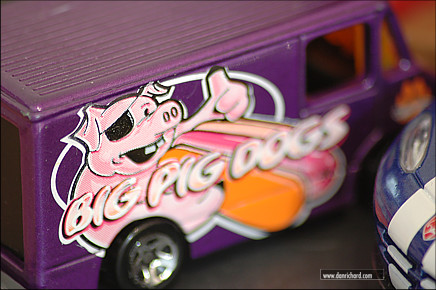
Here’s a photo with the same gear as above with a 400 ISO rating using a shutter speed of 0.77 seconds and the aperture set to F/5.6. This would be a shot taken with the lens “wide open”:
I took this shot by focusing on the pigs left ear, and you can quite clearly see almost everything aside from the ear is completely out of focus. The depth of field for this photo was very short due to my aperture setting.
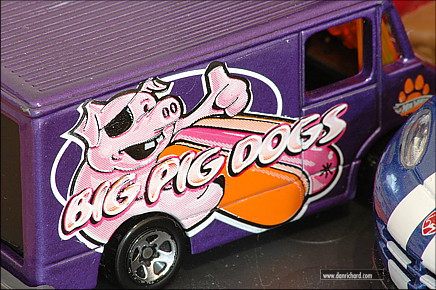
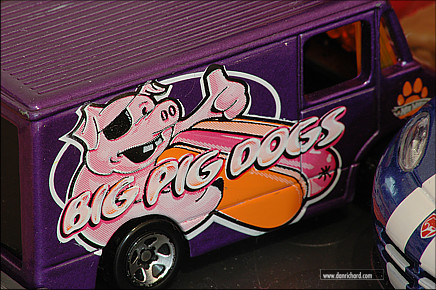
This is the same shot, but I adjusted the camera to a shutter speed of 10 seconds at F/32, which would be closing up the lens to increase the depth of field:
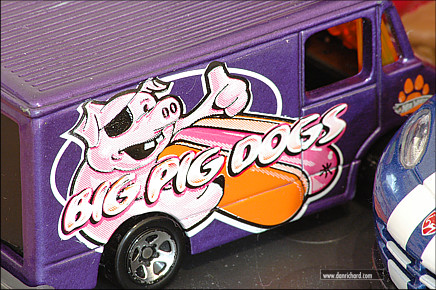
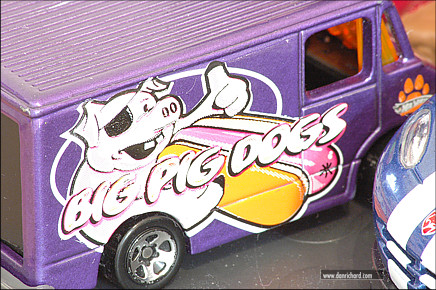
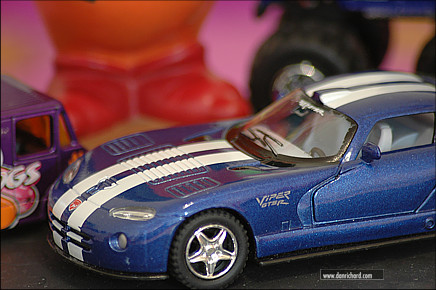
Here are two additional photos taken with the macro on my lens shut off and I backed off the zoom a bit to show more objects in my photo. The first one is taken with the lens wide open with a shutter speed set to a 1/2 second and aperture at F/5.6:
The second shot is with the lens closed up using a 10 second shutter speed at F/32:
You can play with the various settings to achieve different depth of field levels until you capture photos the way you like.
BUT WAIT! What if you don’t have a digital SLR camera that has F-Stop settings? Well, some point and shoot style digital cameras still give you a small amount of control, so look in your instruction manual for any settings that let you control exposure and/or shutter speeds. My Canon s500 for example allows me to control exposure times, and it automatically plays with the shutter speed to compensate. So I can open or close the built in lens slightly by playing with these compensation settings, but it takes some experimentation to see how far you can push your camera.
Final Tips for Close-Up Photography:
A) When it comes to close-ups, you want crisp, clear details and any blurring your photos have should be on purpose. Because you will probably be using ambient light, you’ll also be using slow shutter speeds, which of course means your shots are more susceptible to camera shake, otherwise known as blurry photos. You can avoid this with 2 simple tricks:
1. Use a tripod! When shooting product shots, the camera’s shutter should NEVER be going off while the camera is in your hands or is being touched.
2. Use the automatic timer or a remote shutter release! Don’t risk slightly shaking the camera by depressing the shutter release yourself, even if it’s mounted to a tripod. Use the built in timer or buy a remote shutter release control, which most SLR cameras now support.
B) Turn off your flash! The bright flare of your flash completely floods and drowns out colors, so don’t use it for product shots. This is the #1 mistake you see amateurs do when they photograph items they want to show off or sell. Now, if you can use special flash equipment that uses reflectors and such for flash photography, but that’s going to run you a pretty penny, so you should learn to shoot ambient light to start off before getting more serious about it. So, shut off that flash and slow the shutter right down.
C) Play with your lighting! Don’t just use the same old boring lights… try using different colors or angles or try putting something semi-transparent in front of the light to diffuse it and reduce the overall glare. You might want to look into buying what’s called a Light Tent, which is a special photography tent specifically designed for product photography. I’ll write some additional articles on photography that will cover lighting and such, but if you’re impatient, check out eBay for Light Tents.
Hope this helped you out and please be sure to check out my complete tutorial list for more great articles!
Dan
10 thoughts on “Digital Photography Tutorial: Aperture Tricks and Tips for Close-Up Object Photography”
Very detailed information Dan. I hope you don’t mind, but I would like to drop a link from my forums to this article you wrote. It is helpful for all photographers starting out. 🙂
I’ve been meaning to write something like this, but I’ve just been so busy. Well done my friend.
Best Regards,
Jason 🙂
Thanks dude, and I certainly don’t mind you sharing anything with us when it comes to photography 🙂
Dan
wow thats one good article. my dad is an avid photographer too. i’m sure he will love it. thanks a lot!!
Hey, Ive been taking a Photography course in college and while the teacher went over all of this in class, Reading this tutorial and actually lookin at the effects of what will happen has made me understand it more, thanks for the awesome tut ^.^
Thanks for this tutorial, it has really helped me understand depth of field. The explanation is really good.
good article, but i wanted to know the relevance of close ups in the print media as compared to other types of photography
I love you MAAN, u helped me alot and i really needed it ,, i am a beginner , not exactly ,I didn’t but a camera yet, but i will after my examz , i will really need u more when i get it , so please reply , btw i am planing on buying a sony DSC W110 , what do u think about it
I definitely desire that specific camera. Yes, its not the quality of the camera, but the eye of the photographer, but all the same, I know that I would be a better photographer if I owned one.
Thank you for some other excellent post. Where else may anyone get that kind of info in such a perfect method of writing? I have a presentation subsequent week, and I am on the search for such info.